
Purchase inbox
The Purchase Invoice Inbox helps automate the purchasing process and invoice entry. In addition, you can archive all documents in one place.
If you share your purchase invoice inbox email with suppliers and employees, they can send invoices and expense documents there.
The Purchase Invoice Inbox supports files in JPG, PNG, PDF, and XML formats. The content of XML files is read in automatically, while automatic parsing of PDF invoices is available for an additional fee.
Invoices and receipts submitted in image formats such as PNG or JPG are displayed in the Purchase Invoice Inbox, where the digitization feature reads in the data.
You have your own e-mail address where customers, suppliers and reporting persons can send documents (“Settings” > “Configuration” > section “E-mail”).
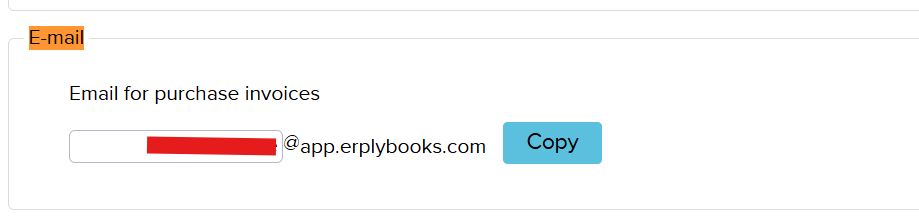
- Share your purchase invoice inbox email address with suppliers and employees so they can send documents directly to your Purchase Inbox.
- Invoices and attached files will be sent directly to purchase inbox (“Purchase” > “Purchase Inbox”). All documents sent to your personal purchase invoice inbox email address will arrive there.
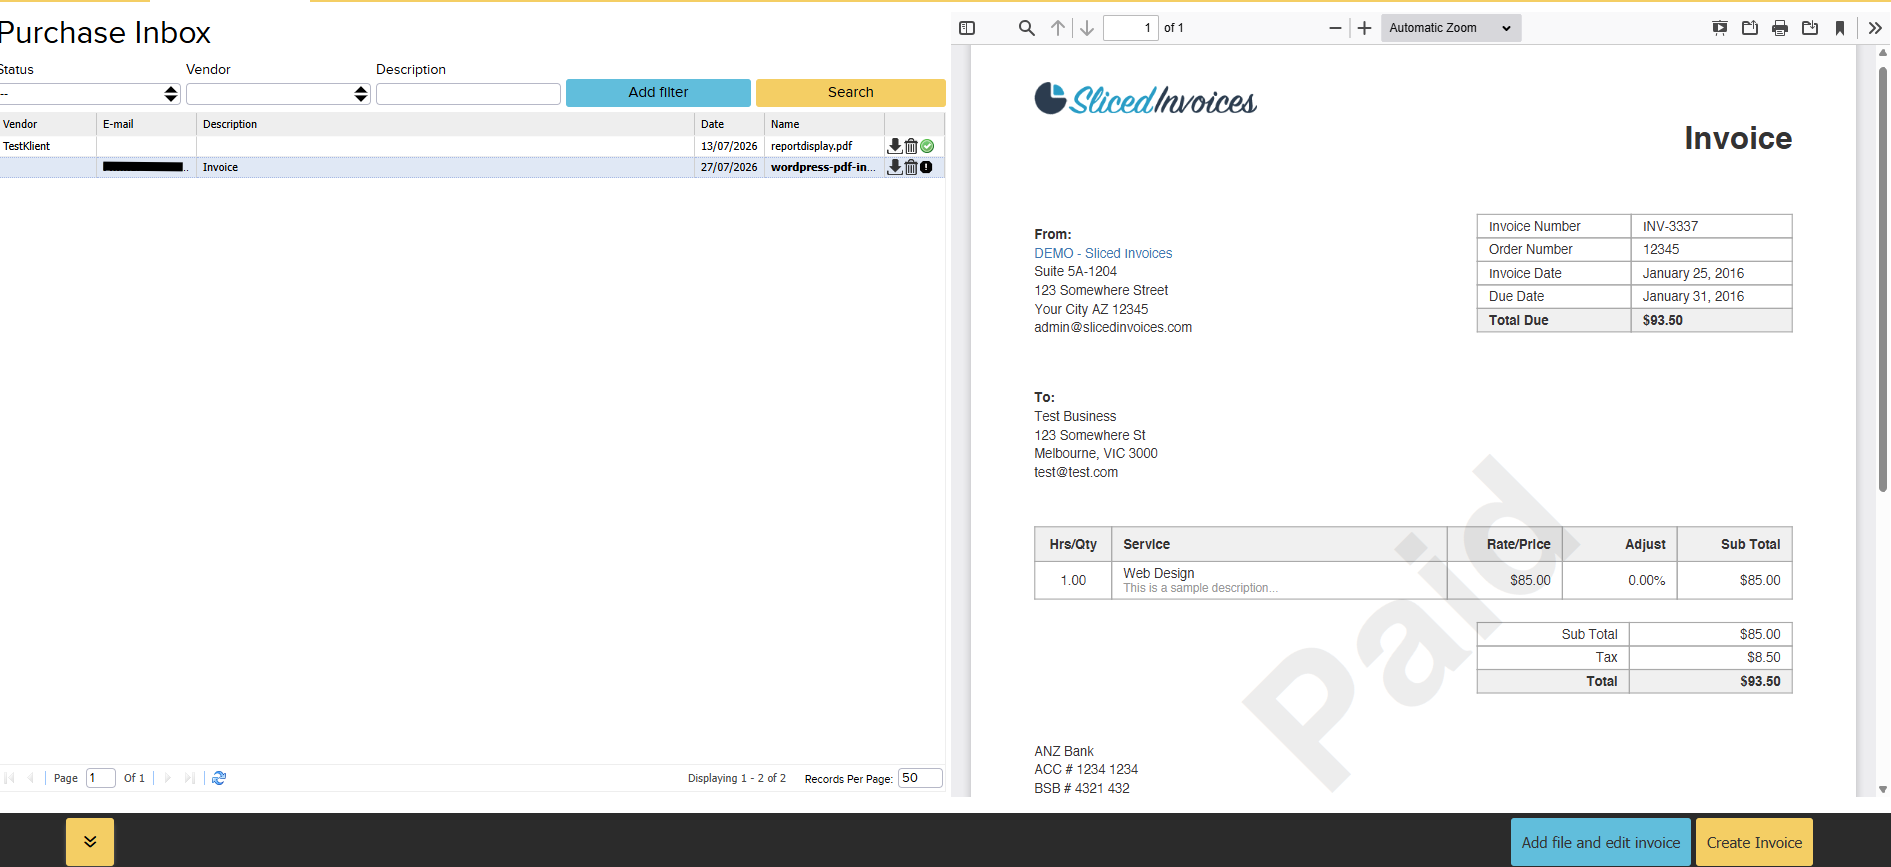
Entering a Purchase Invoice
Below, we’ll look at different scenarios for entering purchase invoices in the Purchase Invoice Inbox.
1. Adding a file when the purchase invoice has already been entered
- Open “Purchase” > “Purchase Invoice Inbox,” click on the row with the sent file, and click the “Add file and edit invoice” button.
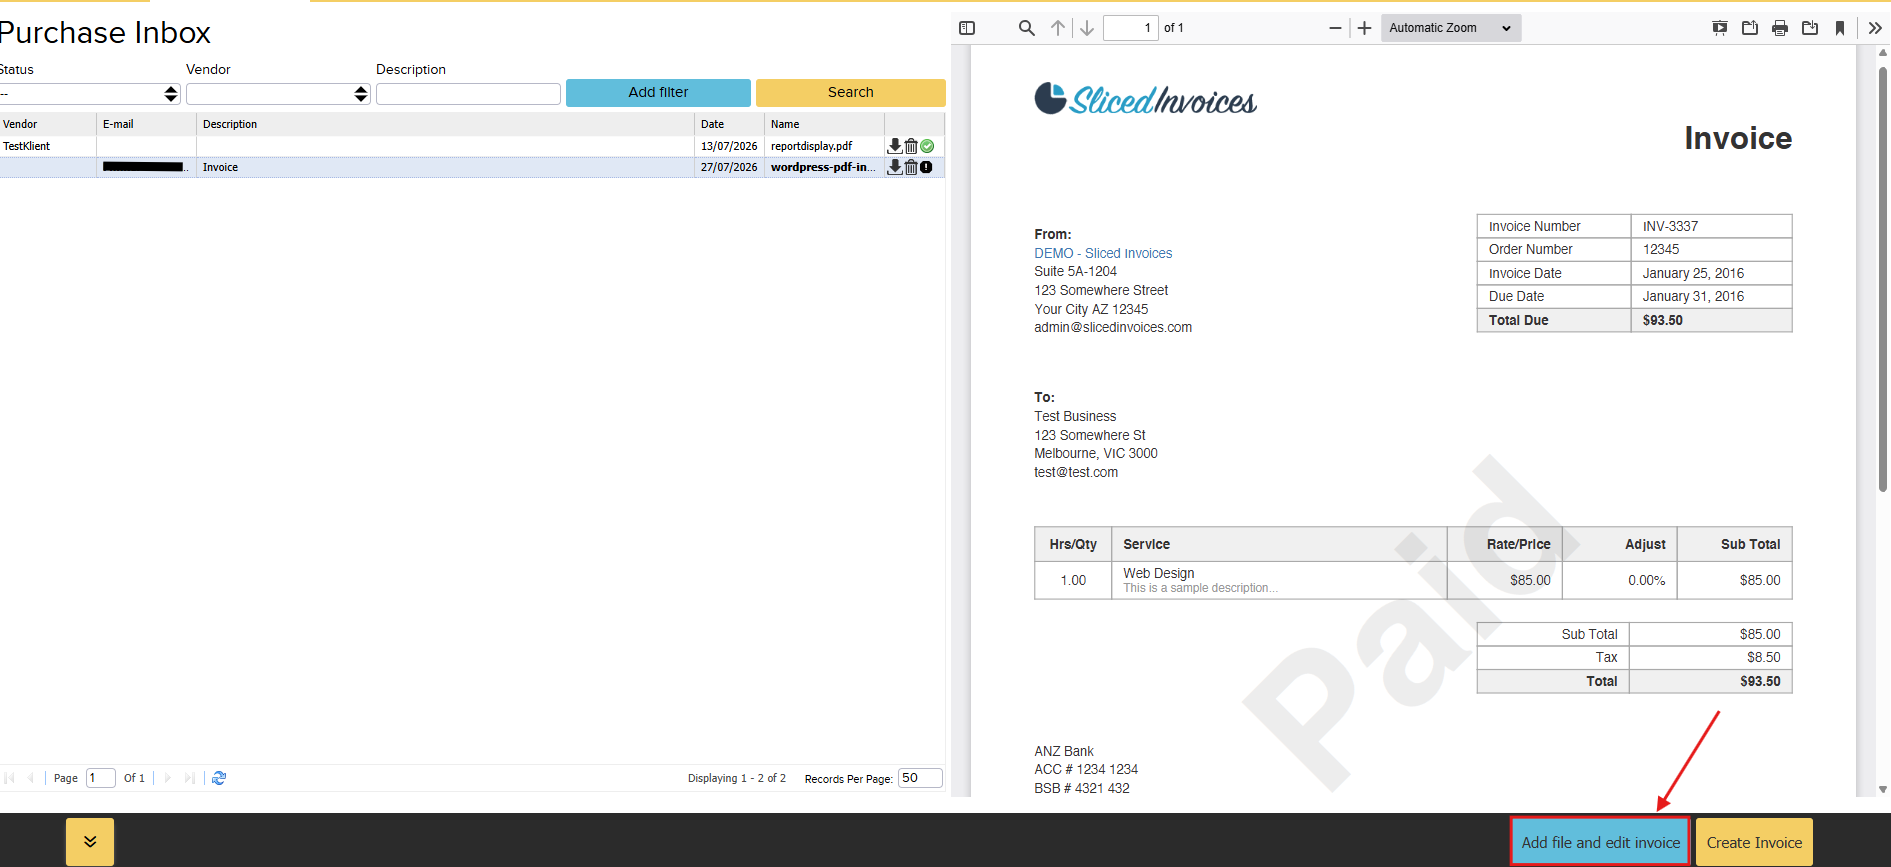
- This will open a list of unpaid purchase invoices. Click on the row of the purchase invoice you want to add the file to, then click the “Add file to invoice” button.
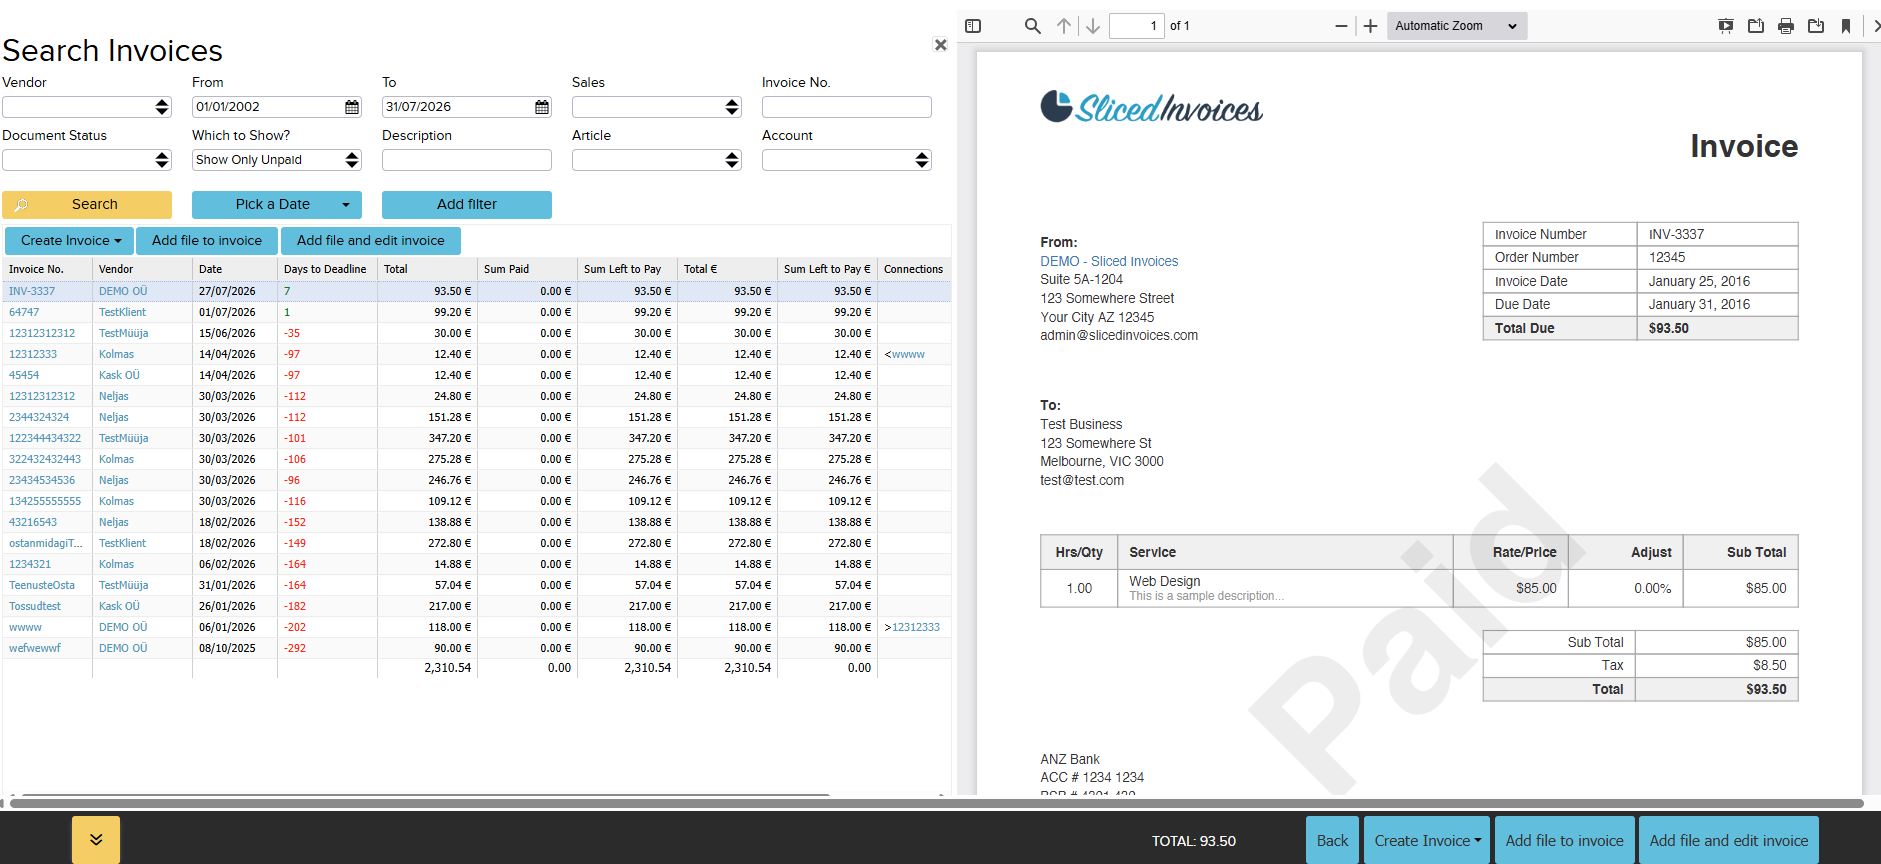
When you want to add files to an existing invoice, then choose the file and click button “Add file to invoice”.
Use invoice confirmation to confirm files and invoices before paying.
2. Creating a purchase invoice from a file
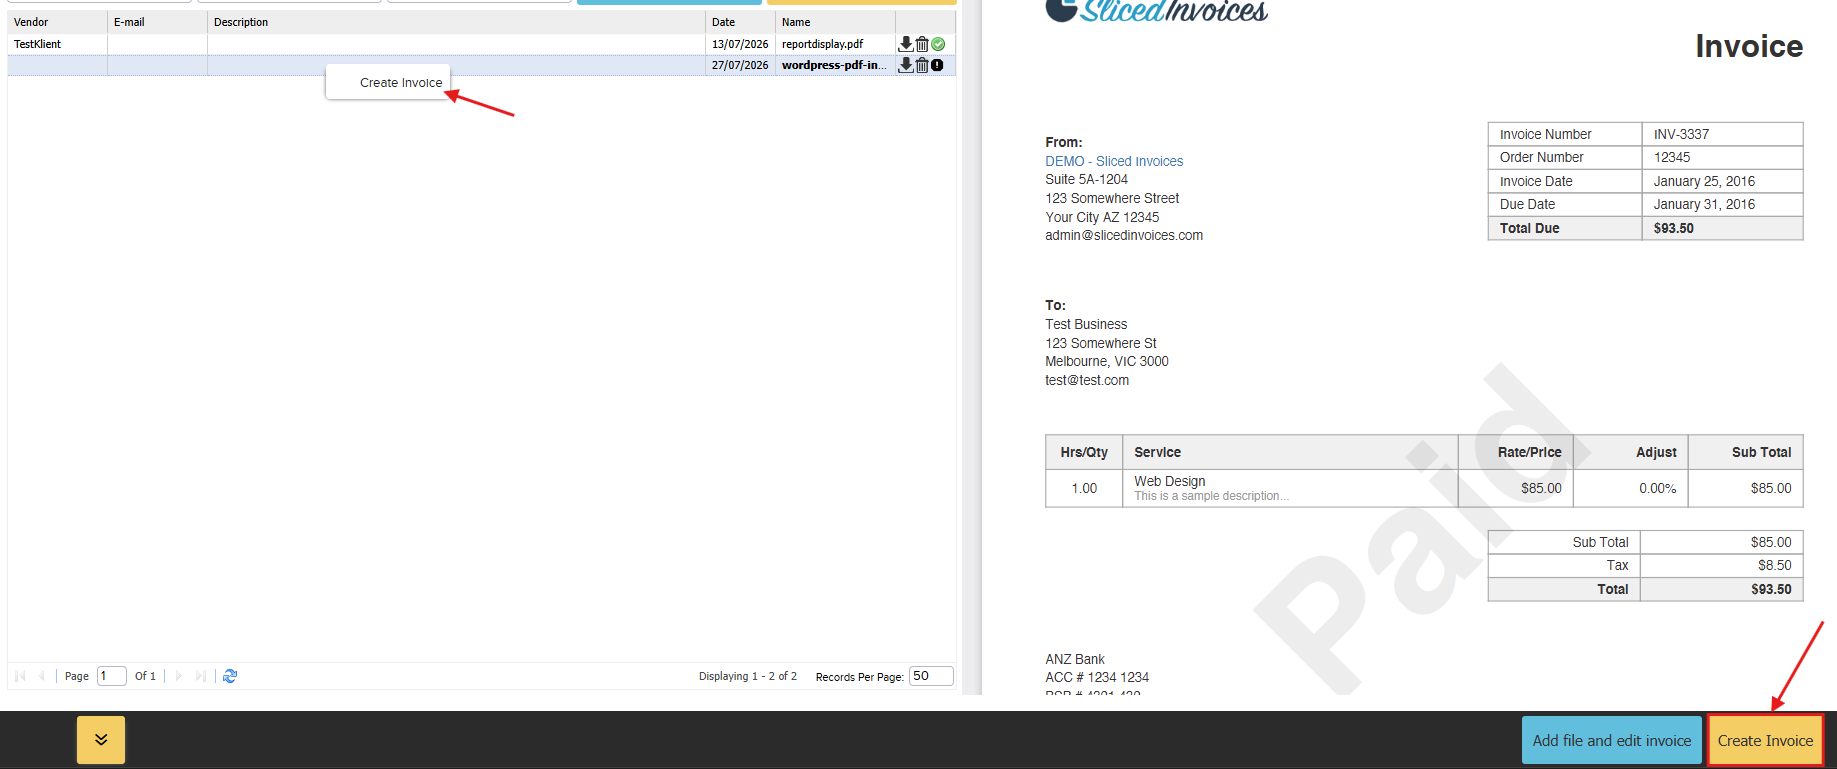
Click on the email row containing the file you want to use to create the invoice. Then, from the submenu, click the “Create Invoice” . You can do the same by right-clicking on the email row and clicking the “Create Invoice” button.
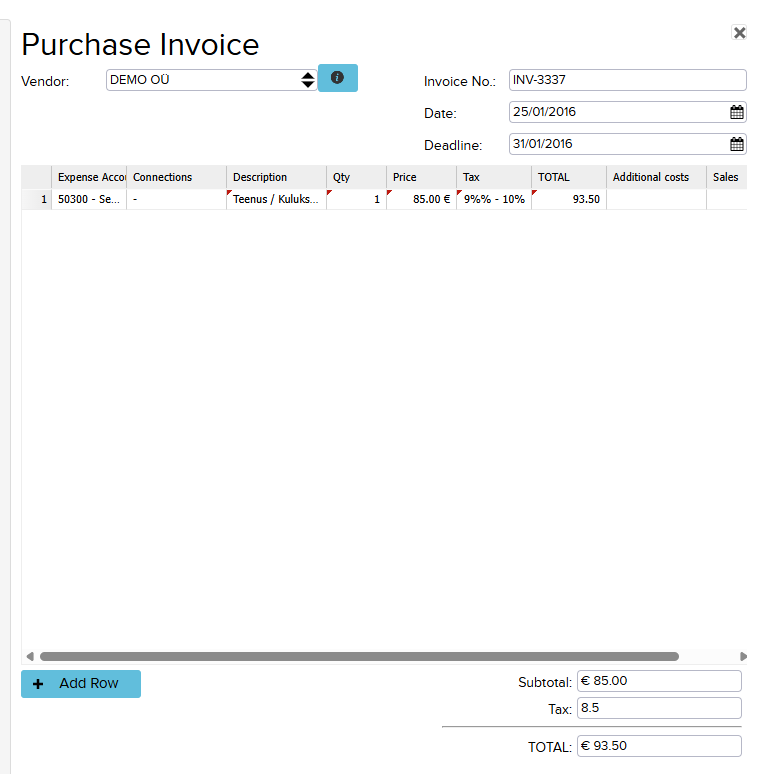
In the window that opens on the left, you can start entering the purchase invoice (or other document) into the program. The program can automatically fill in some of the information for you. Review the information and make adjustments if needed.
3. Reimbursement
- First, make sure the employee has been added under contacts. If this hasn’t been done, you can enter it beforehand (“Purchase” > “Contacts”) or add the employee while entering the purchase invoice.
- Open the Purchase Invoice Inbox and click on the row with the sent email. Then click the “Add file and edit invoice” button.
- This will open the list of purchase invoices. Click the “Create Invoice” > “Reimbursement“
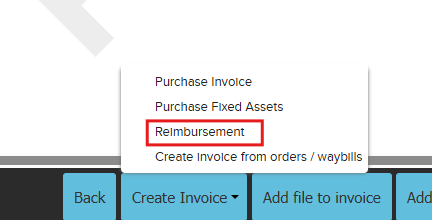
Then you can enter the employee’s purchases in the Purchase Invoice Inbox. On the left, you can enter the details, and on the right, you can see the PDF view.
4. Fixed Asset Purchase Invoice
- Send the fixed asset purchase invoice to the Purchase Invoice Inbox.
- Click the “Add file and edit invoice” button.
- On the new page, click the “Create Invoice” button. From the dropdown menu that opens, select “Purchase Fixed Assets“
- This will open the fixed asset purchase module, where you can enter the fixed asset purchase invoice as usual.
5. Attaching Multiple Files to a Purchase Invoice
- If an email contains more than one attachment, they will be displayed as separate rows in the Purchase Invoice Inbox. To link all attachments from a single email to the same purchase invoice in ERPLY Books, follow these steps:
- Enter the purchase invoice through the Purchase Invoice Inbox as usual.
- Open the Purchase Invoice Inbox again and find the attachment you want to add to the existing purchase invoice. Select the appropriate row and click the “Add file and edit invoice” button.
- This will open the list of purchase invoices — select the appropriate invoice (click on the corresponding row). Click the “Add file to invoice” button if you just want to add the file. If you want to add the file and also edit the invoice information, click the “Add file and edit invoice” button.
Different file types
There are four different types of files: e-invoices, PDF’s, images and other (e.g Excel files).
- With e-invoice, the parser can read out all the information. It means that result depends on how well supplier has compiled the e-invoice.
- The PDF parser can read up to 90% of a file. When it can’t read some part of the information (e.g supplier/vendor’s name) then this information wasn’t in the database. The PDF parser reads the exact information, for example date, deadline, sum, supplier, invoice rows.
- We support OCR (optical character recognition) method with pictures. This method can read out date, supplier, sum. Therefore, take a picture of a paper invoice and upload it with a phone. With the OCR method, we can make an invoice from a picture.
- “Other” means all the other document types. For example Excel files. With these files, the invoice must be entered manually.
Where can I see the invoices?
You can see created files from open payables (“Purchases” > “Open Payables”). You will see invoices with status “confirmed” when you choose confirmed status on purchase inbox.
Automatical rules:
- Type “Purchase invoice file importing rules” to the search box and you can add rules what program uses, when the file arrives to the purchase inbox.
- You can add default parameters for purchase invoices in “Configuration” > chapter “Default purchase invoice importing rules”.
- PDF parser will be used, when file arrives to the purchase inbox and the file has unique parameters, that the system can use in order to compile an invoice.
- When you send e-invoice to the purchase inbox, then invoice will be made automatically.
- OCR is a method that makes invoices based on the information that system reads from the picture. (for example, if you make a picture of your check with your phone and you send this picture to purchase inbox, then system can make an invoice from the picture. You can add rules for that process.
Invoice approval
Setting up the invoice approval
Invoice approval is a process that makes paying for purchase invoices more safe. This allows to assign certain persons who have to verify the invoice before someone pays for it. Because system confirms both files and invoices, it can be used as a digital archive.
When you want to use invoice approval, you first have to determine that you want to use this in settings. Go to “Settings” > “Configuration” and make a tick after “Use invoice approval”.
Next, go to the section “Invoice approval rules” and add following settings:
- Enable (Yes/No)
- Min number of approves?
- Invoice must be approved by?
In addition, you can determine the hirarchy of verifiers. It means, that people, who are first in order will get the e-mail first.
- Go to “Settings” > “Configuration”> go to the chapter “Automatic email approver process”.
- Click on the “Manage” button. In order to add rows, choose the “+” button.
- In column “Order of the operations” add the number.
- In column “Invoice must be approved by” add an email address.
Then save and refresh the page.
Using the invoice confirmation
Who can verify invoices?
A person who has the verifier rights can confirm invoices. These privileges can be added when you go to “Settings” > “Users”. You will see the list of users. Make a double-click on the user email address to see the privileges. Make a tick in front of “Settings-Verifier”.
If verifier only checks, then it’s reasonable to remove the right to enter purchase invoices (remove a tick in front of “Edit – Purchase invoices”). Then click on save button.
Verifying process
Both file and invoice can be verified – depending on what you need in your company. If all your invoices must be archived in system, then demand that invoice can’t be sent out without a file. Then use only the invoice approval system- after you have created the invoice from a file, the system adds a “Confirmed” status to it. Therefore, you can’t create an invoice that has a file with a “rejected” status. If one verifier rejects the file and the other one confirms it, then the file has a declined status. The invoice can be confirmed if all verifiers have approved it.
NB! If you receive files later, then it’s reasonable to make the purchase invoices ahead of time. Your accountant can’t verify these and those invoices remain with status unconfirmed. Then the verifier can approve these invoices (or wait for the invoices and approve these).
Different file statuses:
- Unconfirmed – Waits for someone to verify it.
- Pending – File has been verified and user can create a invoice
- Confirmed – The invoice has been created
Different invoice statuses:
- Confirmed- a file has been added to the invoice and a verifier has approved it.
- Not confirmed – a file might have been added to the invoice, but it has not been verified yet. Or there is no file
- Locked- User can’t make any further operations with the file, when the file is locked.
- Confirmed and payment sent to bank- file has been added and payment file has been created.
In the purchase inbox, there is a button “Ask confirmation”. When clicking it, the main approver, CEO or someone else important gets an email, that asks to confirm the invoice. The email recipient must be added to the user list (“Settings” > “Users”). When clicking on the “Ask confirmation” button, you can choose who you want to send this letter to. You can use this function, when a person doesn’t use ERPLY Books often, but you still need his/her approval. The recipient will get an email and will see an invoice file and when clicking on links, he/she can confirm or reject the invoice.
Details about invoice confirmation
- Invoice/ file can’t be confirmed, if it has been sent to someone and the recipient hasn’t confirmed it (when you use button “Ask confirmation”). The recipient must verify or reject the invoice in email or in ERPLY Books
- Verifying in email is a process outside of the main system. Users can use it on a phone and links go to only one operation- confirming or declining.
- If you chose the wrong link by accident (wanted to approve but rejected) then you have to go to ERPLY Books and manually approve/ reject the file or invoice. It means that you can’t use one query twice.
- When the user has declined the invoice 3 times and now clicks on “Confirm” then the last status remains and the invoice is confirmed now.
The following video shows further information about the Purchase Inbox:
FAQ
Why the PDF parser doesn’t work with my files?
The information will be read out when the system understands it’s an invoice (finds heading, footer and invoice rows) and the text must be in a copyable format. In addition, we support specific languages. If an invoice is in an unknown format and language, then PDF parser won’t work.
PDF parser changed the invoice and now the invoice rows look weird.
Use the button “More” > “Clear rows”.
What should I do with paper invoices?
If you have many paper invoices then take a picture of these and upload those with a phone. They will arrive in your purchase inbox and you can archive these.
What’s the easiest way to manage a reporting person, who has a lot of purchases in a month?
Give your ERPLY Books email to reporting persons. Then they can send all their invoices and checks to one place. When you click on the button “Find and add to invoice”, you can add files to a reporting person’s invoice.
What does the system do with e-invoices? (At the moment we support EE, LV, FI)
When it’s just a simple invoice, all the information will be read out. When there is a PDF or picture in this e-invoice, you can see this image on screen and the system can read out the information. When it’s another kind of information (not PDF, e-invoice or picture) then you will not see any images and you have to enter this invoice manually.
How can I make a copy of the invoice?
When you choose the supplier (purchase inbox) with whom you already have invoices, the button “Copy” appears in the bottom menu. Click on this button and see information about previous invoices connected to this supplier.
How can I find inventory products?
The function that enables to find ERPLY products from purchase inbox is an extra setting. You can add this feature in “Settings” > “Configuration”, in the section “Other options” make a tick in front of “Search products in purchase inbox?”.Then save and refresh the page.
This setting is useful in the situation where you don’t have any document that you can use to make an invoice. For example, when you have a purchase order, then it’s reasonable to create a purchase invoice when products arrive. In addition, you can get the information about purchase invoice through EDI. If you don’t have any previously compiled purchase invoices, you have to search all the products manually. That’s time consuming. Here, ERPLY Books can help you. If the system can find product codes from the purchase invoice, then it can find products from ERPLY, based on that information (assuming the system has the right information it can find the right products: suppliers code, EAN code, product name).
Process:
- Create an invoice in purchase inbox
- If you choose the supplier (or the program finds the supplier) and this is an inventory related supplier, then on the menu below, you can click on a button “Find in ERPLY products”.
- Click on that button and the program will find matching products from ERPLY inventory.
- If there is a green mark in front of the row, it means that system found the match from inventory.
- If there is a red mark, then the system didn’t find the match and you have to search the products manually (click on a magnifying glass logo).
- If all the rows are correct, then save.
NB! You can’t take products into inventory through the purchase inbox. You have to do that in the ERPLY inventory. Therefore, if you can’t find some product, then check if it’s in ERPLY Inventory. If not, you have to add it.
If there are different units in the inventory and in the purchase invoice then the system will not convert those units automatically. That’s an extra development and if you are interested in that then connect us via email support@erplybooks.com.
How can I return sales?
You can return sales if you have activated the function “Search products in purchase inbox?”. This is an extra setting and you can add this in “Settings” > “Configuration” and make a tick in front of “Search products in purchase inbox?”. Usually, when you get an invoice, there is a document with a list of products you have to return, then you should have to start to enter this data manually. Now you can forget about manual data entry, because PDF parser will do this automatically by linking products, that you have to return. See the reason why something is returned under additional information, in cell “Reason for return”.
If there are some products missing from that list, then add rows to add products. Save, if you have all the needed information.