Prepayments in ERPLY Books
Prepayments module in ERPLY Books has been renewed. The prepayment process is now much simpler:
- Invoices will not create prepayment
- Prepayments are not connected with invoices
- Prepayments can be added to different accounts
- Prepayment status will be checked, when prepayments are used
- Using prepayments goes through prepayment status
NB! All examples are based on customers. As purchase process is the opposite of sales, all the examples apply to purchases as well.
Adding and using prepayments
How to add prepayments (Sales):
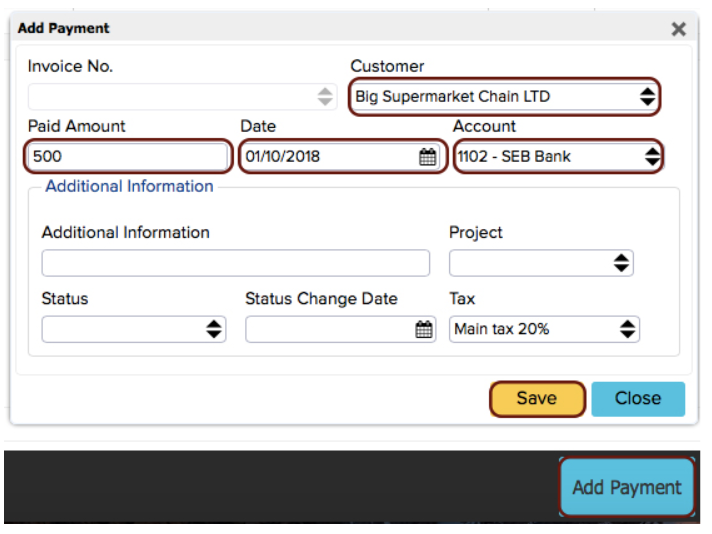
Go to “Sales” > “Open Receivables”.
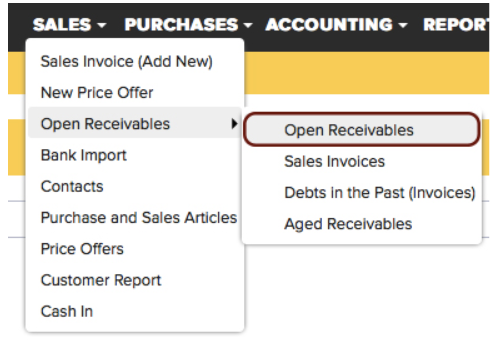
In Open Receivables do not select any invoices. Click on “Add Payment” > add a prepayment to a customer.
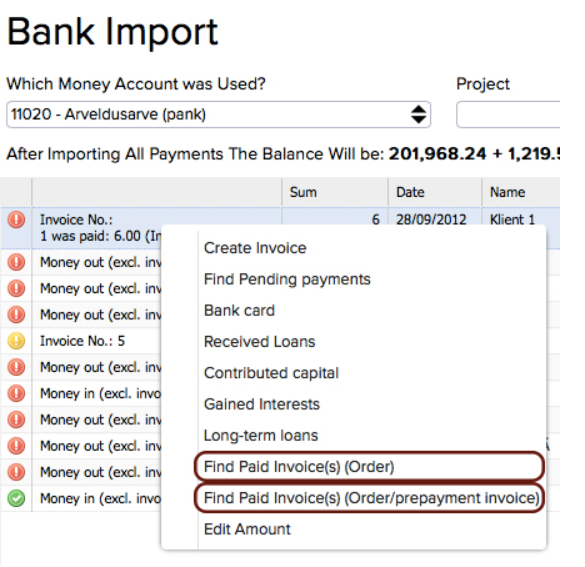
To ERPLY POS & Inventory customers: In the Bank Import, if you want to pay for an order/prepayment invoice, right-click on the payment and click on “Find paid invoice(s) (Order)” or “Find paid invoice(s) (Order/Prepayment invoice)”.
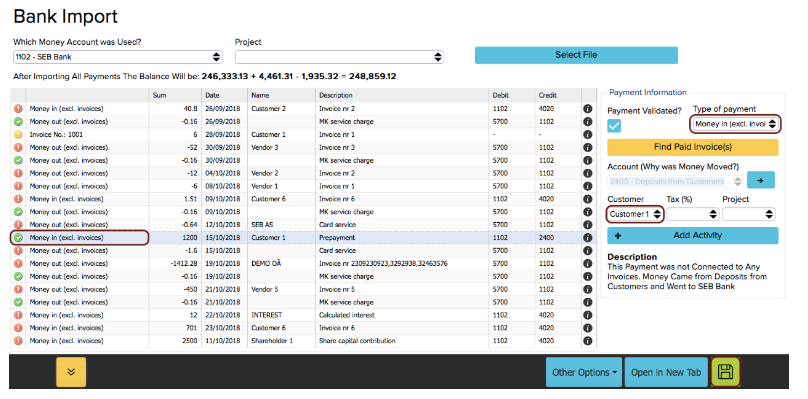
In the Bank Import, if you want to link a payment with a customer prepayment, choose a payment and then the desired customer from the customer cell.
How to use prepayments:
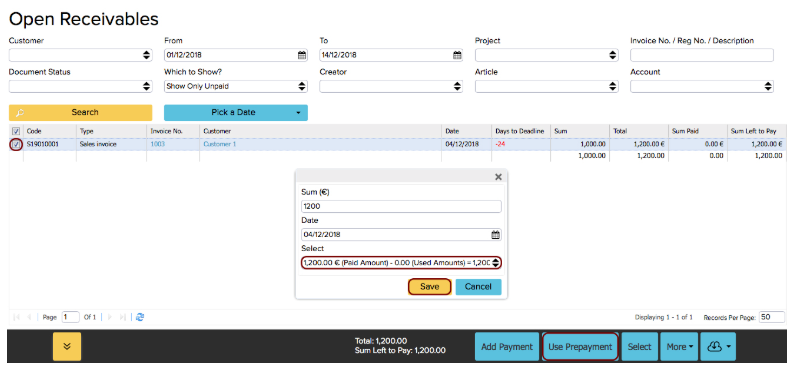
- When prepayments are made in an unlocked period, go to “Open Receivables” > choose an invoice > click “Use Prepayment” > choose a prepayment from the drop-down menu > click “Save”.
- When prepayments are made in the locked period:
- Add a negative prepayment to the customer, use the Clearing account (the process is the same as adding prepayment, but use a negative amount).
- Add a payment to the invoice, equal to the prepayment amount, use the Clearing account.
- When prepayments are made in the locked period:
Prepayment statuses
Prepayments have two statuses – Confirmed and Not confirmed.
Confirmed means the prepayment has been used. A confirmed prepayment has the exact time when it was used – it’s important for showing customer history.
Specifics of using prepayments
ERPLY Books always creates two transactions for prepayments:
- Initial prepayment
- Use of prepayment
When you use prepayments, pay attention that when you are only using a part of the prepayment (e.g. invoice amount is 100 EUR and prepayment is 200 EUR, which means used prepayment is 100 EUR), ERPLY Books divides the initial prepayment into two parts.
VAT for prepayment
VAT is added to the prepayment and to using the prepayment when there is VAT added on the customer card.
Prepayment VAT will be added to both transactions: initial prepayment and use of prepayment.
Changing a prepayment
A prepayment can be changed if it has the Not confirmed status (i.e. not used yet). When you use a prepayment, ERPLY Books automatically locks the prepayment and it’s transactions. Transaction lock means that the user cannot change the prepayment or change the way the prepayment is used. Locking applies because these two transactions are connected and you can’t change one without the other.
Existing Not confirmed prepayments can be changed in the Cash In report.

If you want to change a transaction, you have to remove the journal lock.
You see it when you try to delete the transaction, the program opens the journal that is locked. The journal lock can be removed when the user changes the journal status to Confirmed. Then the software lets the user change the transaction. But that’s not the best way to do it – when you change the used prepayment, the initial prepayment should also be changed.
Prepayment accounts
By default, prepayment accounts are under System Accounts:
- System account for customer prepayments – by default, it is set for all sales-related prepayment transactions.
- System account for vendor prepayments – by default, it is set for all purchase-related prepayment transactions.
- Reporting person – will be defined, when prepayment is set to an employee. If you want to set another prepayment to an employee, do it on the employee’s card (“Purchase” > “Contacts”).
- Prepayment groups (click here to see the separate manual):
- It’s possible to add new rows in System Accounts. Add type Prepayment Group;
- While adding a new prepayment group, it’s possible to choose a Prepayment account; in the Bank Import the user can set a separate account for a specific transaction.
- Prepayment VAT saving account – it is needed when you use prepayment VAT and you want a separate saved amount for the prepayment VAT on that account. This can be added under System Accounts. Add an account with a type Prepayment VAT saving account.
Overpaying an invoice
From now on, ERPLY Books will not allow you to make overpayments anymore. The remaining amount will be added to the prepayment account, by default.
Returning a prepayment
This process must be done manually. Go to “Open Payables” > “Add payment” (if you want to return the amount that has already been used, choose the desired invoice) > choose customer/vendor > add the negative amount, which was returned.
Fixing the date of use of a prepayment
In order to fix the date on which the prepayment was used, there is an option for “Status Change Date” on the prepayment.
However, if you change the date of a prepayment that has been used (for example, the date of use of the prepayment was 31/10/22 but now it is 31/01/23), this does not change the date of the original prepayment in the “Status Change Date” value. This is also one of the reasons why all transactions are locked when using a default prepayment. It is possible to manually change this date on the prepayment.

If you want the date of the prepayment to be automatically changed according to the date of the prepayment, add this rule under Global Parameters:
1. Open ”Global Parameters’’ from the search box on the main page
2. Add a new row.
- Name: GLOBAL_UPDATE_STATUS_DATE_WHEN_EDIT
- Value: true
3. Save, then log out of your account and log back in