Import data to ERPLY Books
It is easiest and most convenient to edit data in Excel, OpenOffice, Google Sheets, or another spreadsheet program. Those are also the easiest programs from which data can be imported to ERPLY Books.
Recommended sequence of importing
If you wish to get started with ERPLY Books and transfer old data, the recommended sequence of importing is as follows:
- Account plan (if you wish to continue with your previous one)
- Contacts (optional)
- Projects (optional)
- Articles (optional)
- Invoices (both outstanding and unpaid invoices)
- Prepayments
- General ledger (i.e. entries. Please note! Only possible if you also import your account plan!))
- Fixed assets (optional)
- Account balances – Enter last! If you enter the opening balances first, the other transactions change the opening balances.
Other importing of data depends on either the necessity or the possibility to transfer them to ERPLY Books via another program. For example, ERPLY POS and Inventory allow syncing data and it does not need to be imported manually.
The copying and pasting process
Importing to ERPLY Books is done with the copy-paste method. The key combination Ctrl + C copies the processed data and Ctrl + V pastes it to the respective import module of ERPLY Books.
- To copy data, select it on your spreadsheet program with the key combination Ctrl + C
- To paste the data, mark the first field as blue on ERPLY Books – to do so, click on the required cell. The data will be pasted respective to this cell.
- To paste the data, press Ctrl + V (clicking the right mouse button will not work)
Note that:
- You can import one column at a time or all columns at once
- When importing one column at a time, the program will ignore empty rows – if there are empty cells in a column (e.g. client data), paste all columns at once
- Columns can be shifted – simply click on the header of the column and then drag it left or right, holding the mouse button down.
- If the program has to create new lines instead of specifying the old ones when pasting, the program adds data to other cells by default (e.g. when importing clients, the income and expenditure accounts are designated automatically from the system accounts – if you wish to specify them, you will need to paste them separately)
- Please note! Copying and pasting does not work on Internet Explorer and Safari.
1. Importing accounts (optional)
Accounts constitute very important accounting information and must be completely in order. If you find the following instructions complicated or confusing or if some accounts are given the wrong types during this process, we recommend letting us import your account plan.
By default, each organisation on ERPLY Books has a standard account plan which is generally suitable for organizations that have not previously described their economic transactions systematically. We recommend importing accounts (the account plan) if adding the accounts one at a time and manually is overly bothersome. The default account plan in Estonian is available in the module “Accounting” -> “Chart of Accounts”.
In order to import your account plan to ERPLY Books, you will need to change the system language to English (under the flag button on the top taskbar). The account plan module is located in the same place: “Accounting” -> “Chart of Accounts”. Before importing, the account plan must be converted to a format that can be imported.
The ERPLY Books account plan contains the following fields (Name, * marks a mandatory field):
- Account number * – must be unique, no numbers can be repeated
- Account name * – a descriptive name
- Account type * – assets, equity capital, debts, income, or expense
- Balance type * – the type under which the account is displayed on the balance sheet
- Income Statement type * – the type under which the account is displayed on the income statement
- Cash Flow type * – the type under which the account is displayed on the cash flow statement
- TAG – in this column, you can specify the account groupings if the accounts are not grouped conveniently for you on the balance sheet or the income statement.
- Currency * – the currency tied to the account
- Period locked to – you can set a date until which the data on the account is locked. All accounts can also be locked simultaneously (the ‘Lock’ button on the bottom taskbar). If you wish to change the data on the account (open a period), simply change the date to an earlier one.
- Tax – you can set a certain VAT type for the account type
The number and name of the account are taken from your previous account plan. The name of the account is not connected to the system language (if you are using the system in English, still set the account names in the language in which you wish to see them displayed). If you wish for your account names to be in several languages, you can add translations to the name field, separating them with a vertical bar (|). For example, in the name field for a cash account, you can write both the Estonian and English names: ‘ET=Kassa (sularaha)|EN=Petty cash’.
The proper options for different types of accounts, balance sheets, income statements, and cash flows are shown in the standard account plan. In all of cells of these columns, you can see the possible types in a drop-down menu when clicking on a specific cell. We recommend first getting to know the standard account plan and see which types are available in ERPLY Books.
Here is an example to illustrate this: a situation where you wish to set types for cash account. In that case, you will need to select:
- Account type: Assets
- Balance type: Money
- Income Statement type: Not shown in income Sheet
- Cash Flow type: Cash and cash equivalents
All other accounts must be put into the same format!
All types must be written in the same way (check uppercase and lowercase letters!) as they are in ERPLY Books. Otherwise, ERPLY Books will leave improper cells blank when importing and you will have to select them again manually. The same result occurs of you choose the wrong types for an account (e.g. income account types for an assets account).
When you have completed your account plan in a spreadsheet program, you can import it to ERPLY Books. Copy the entire table (without the header row!), highlight the first cell of the ERPLY Books account plan (Account number), and paste the data into the table with Ctrl + V.
When this is done, check the following:
- Are there the right amounts of each type of account?
- Are all the account, balance sheet, income statement, and cash flow fields filled in? If not, you will need to fill them in manually.
When you have checked the above, save your data, using the green save button on the bottom taskbar. Now, you have imported your account plan and can switch the language back to Estonian.
Then, you will need to set up system accounts – accounts that ERPLY Books uses for automating various transactions: on invoices (in entries connected to item lines), in wage calculation (setting wage expense and debt accounts), etc. Setting up system accounts is very important.
You can find system accounts at “Settings” -> “Initial Data” -> “System Accounts”. You will need to add an account from your account plan (second column) to each system account name (first column). When this done, save your data.
When the system accounts are set, you will need to change the accounts for VAT types. To do so, go to “Settings” -> “Tax Rates”. Find the correct VAT account number from the system accounts and paste it to all cells of Account(debit) and Account(credit). When you have replaced everything, save.
Now, everything connected to your accounts is set up.
NB! You can find Tax Rate Name if you go to “Settings” -> “Tax Rates”. If Tax Rate doesn’t exist in the Tax Rate List you need to add it, otherwise data import won’t happen. Also you need to add the same Tax Rate Name as in the list to your import file.
Please notice that if you have different Tax Rates on the invoice, you need to import this invoice with two rows, meaning you need to add every tax rate as a separate row in your import file with same invoice number.
2. Importing contacts (optional)
Similarly to other data, contacts can also be imported using the copy-paste method. The contact (importing) module can be found at Sales -> Contacts and Purchase -> Contacts. This table also allows changing the order of columns when importing organised data (by dragging the headers of columns to the correct places). To see which values can be added to a contact, take a look at the headers of the table, and based thereon, create a suitable table of contact data.
In addition to the table headers displayed by default, you can add more columns. To do so, go to the heading of an existing column and press the button that appears. From the drop-down menu, press Columns. A new drop-down menu will open, in which the values displayed in the table are ticked off, and those that are not displayed do not have a checkmark. If you tick one of the values, it will be added to the end of the table as a new column. From there, you can drag it to a different position.
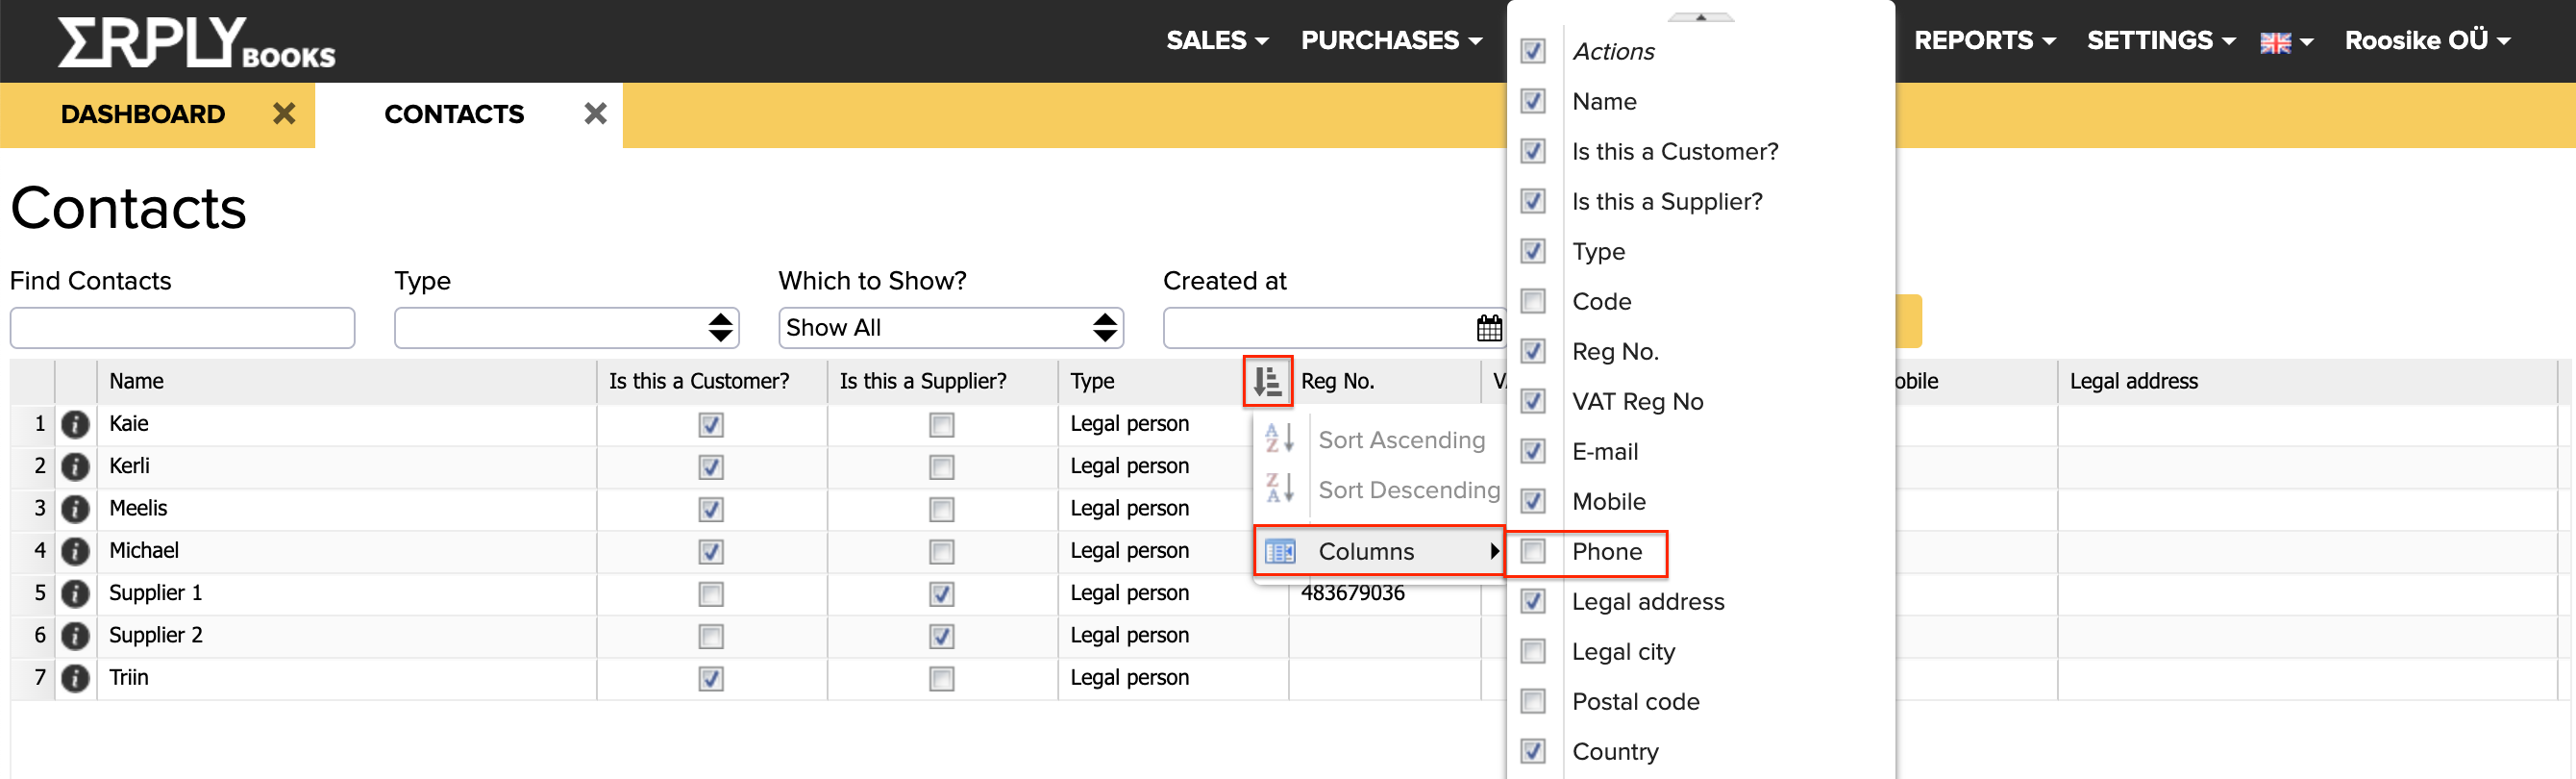
An example of adding a column, in which ‘Phone’ is added.
If you have created a table on Excel that shows the correct contact data and if you have properly sequenced the columns on ERPLY Books, copy the data and paste them into the table of the contact module. To copy the data, select it without the menu bar and use the key combination Ctrl + C. To paste the data, highlight the first cell of the table on ERPLY Books and press Ctrl + V.
3. Importing articles (optional)
Importing items is similar to importing contacts (see the previous chapter). The item module can be found at Sales -> Purchase and Sales Articles and Purchase -> Purchase and Sales Articles.
4. Importing projects (optional)
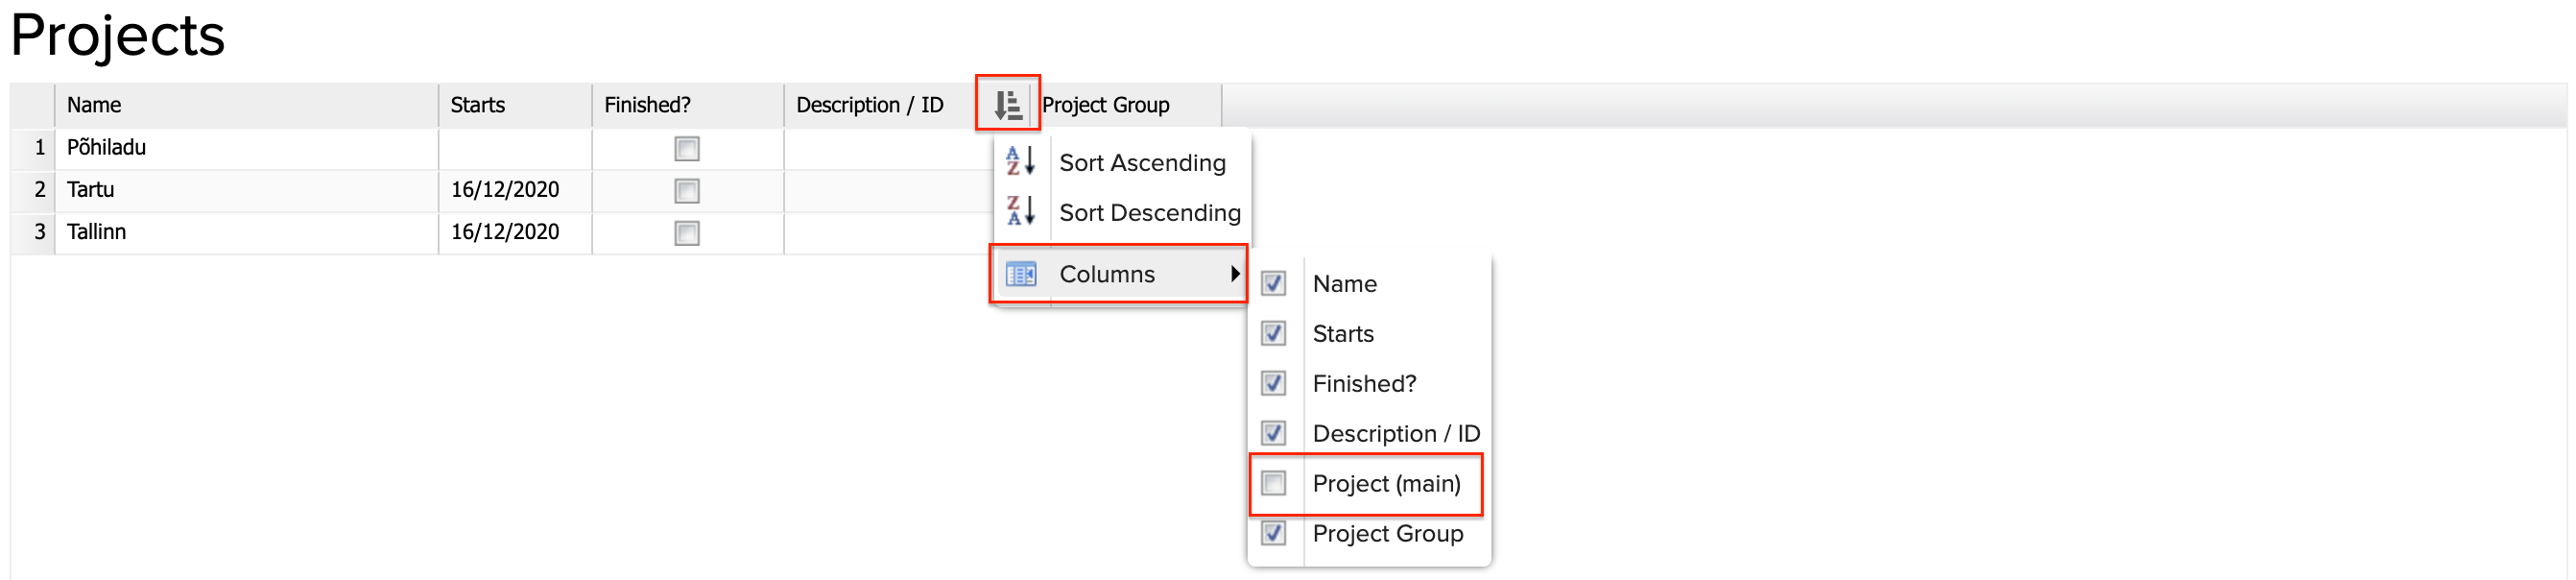
The project module is located at Settings -> Initial Data -> Projects. In the project table, you can add the project’s name, starting date, and main project, if you have added it in previously. The following image describes adding the main project column.
Once again, rearrange the columns into the order of your choosing, copy the organised data, activate the first cell of the destination table with the key combination CTRL+C (it will turn blue), and paste the data into the table with the key combination Ctrl + V. After that, save.
5. Importing invoices
When you have finished a certain accounting period in your previous accounting software and wish to continue working in ERPLY Books, you will need to import the outstanding sales invoices and unpaid purchase invoices into the system.
- The module for important outstanding sales invoices is located at Settings -> Initial Data -> Import Sales Invoices
- The module for unpaid purchase sales invoices is located at Settings -> Initial Data -> Import Purchase Invoices
If you have more than 1,000 invoices, import them using a CSV file (described at the end of this chapter).
Before importing your data, you should go to the ERPLY Books page Settings > Tax Rates and change the VAT subtype of the VAT type ”Tax Free” from ”Tax Free” to ”Main Tax”. To do so, choose ”Main Tax” from the dropdown menu and save.
The system also requires refreshing your browser to apply the changes. After importing your data, the subtype of the tax-free VAT type should be set back to ”Tax Free”. As the subtype ”Main Tax” was also changed to ”Other tax” during the changes, this should also be switched back to ”Main Tax”.
Before importing, the data must be formatted as follows on your spreadsheet program (the order of column must be the same as in ERPLY Books):
- Invoice number
- Customer/Supplier (for sales/purchase invoices, respectively)
- Item
- Total sum (debt)
- Date
- Term
- The values in the columns Invoice number and Sum must be formatted as numbers.
- The values in the columns Customer, Item, and Date must be formatted as (plain) text.
- The values in the column Sum must be in a format where the numbers of the integers are not separated by any symbols (comma, space – i.e. one thousand is 1000), the integer is followed by two decimal places, and the decimal places are separated with a period.
- The values in the columns Date and Term must correspond to the date format used by you in the program (the default setting, as seen on the picture, is DD/MM/YYYY). Please note! Make sure that the values in the Date column are also correct in the function line (fx). If they are not, change the formatting of the column.
- Designate the value of the Article column yourself.
Additional functionality: you can also add the columns Income account and Project if it is important for certain invoices to be sent to a specific income account or be connected to a certain project. The same logic applies as before– simply add them to the columns after ‘Date’.
- The values in the column Income Account must formatted as numbers
- The values in the column Project must formatted as text. If you do not add these columns, the system will import them from the system accounts page (Settings -> Initial Data -> System Accounts) and no project will be set. These values can also be added/changed later on the invoice.
Before copying and pasting organised data ERPLY Books’ import module, its columns must be put in the correct order. To do so, grab the header of a column and drag it to the correct place. The order of columns of the import module must be the same as the order of columns of your organised data file.
In the above example of a spreadsheet program, the order of columns in the import module is as follows:

Then, carry out the following process (with sales and purchase invoices separately):
- Select the data in the spreadsheet program (leaving out the headers!) and copy it, using Ctrl + C
- Go to the import module of ERPLY Books and click the empty white box under the headings (or press the + button on the bottom taskbar) to create a blank row. Click in the first cell of this new row to make it active. The cell will become blue. Paste the data, using Ctrl + V.
- Make sure that all data is added to the module correctly (in each cell that has to contain something). Save.
- Based on the amount of data, the import process may take a few moments up to a few minutes.
We recommend importing up to 100 invoices at a time.
Imported invoices are available in the following locations:
- Sales invoices: Sales -> Sales Invoices -> Open Receivables
- Purchase invoices: Purchase -> Purchase invoices -> Open payables
Once all invoices have been imported, return to the page Settings -> Tax Rates and change the subtype of the type Tax Free back to ‘Tax Free’. You will also need to change the subtype of the type Main Tax back to ‘Main VAT’. After that, save and refresh your browser to apply the changes. Now, your invoices have been imported and temporary changes restored.
If you have more than 1,000 invoices, download a CSV file from your organised data file (note the default separator!).
Go to Settings -> Initial Data -> Import Transactions and upload the file there. Then, choose the following:
- Does the data start on the first row? (excluding the header row)
- What is the date format?
- Are the decimals separated by a period or a comma? (the symbol separating the integer and the decimal)
- You will only need to change the coding for OpenOffice files – choose UTF-8.
- Choose your file separator. (If you have prepared a CSV file, you were able to choose the separator)
- In the ledger type cell, choose either outstanding invoices (for sales invoices) or unpaid purchase invoices (for purchase invoices).
- Choose the date for which you wish to create an import entry.
- If necessary, choose the project.
In addition, designate the column order on the right – i.e. set the order corresponding to the order of columns in the organised data file. Only then, press Open.

If no accounts appear in the table Accounts at the bottom of this page, the system will show a message that the import was successful. If any accounts appear, however, they have not been imported in ERPLY Books and you will need to add them on this page or the account plan page and save your changes to make sure that the invoice entries of those accounts are imported.
You can read more about importing invoices with custom fields here.
This following video shows further information about importing invoices to ERPLY Books Accounting program:
6. Importing prepayments
Prepayments need to be entered manually. To do so, go to one of the following locations:
- For customers: Sales -> Sales Invoices -> Open Receivables
- For suppliers: Purchase -> Purchase invoices -> Open payables
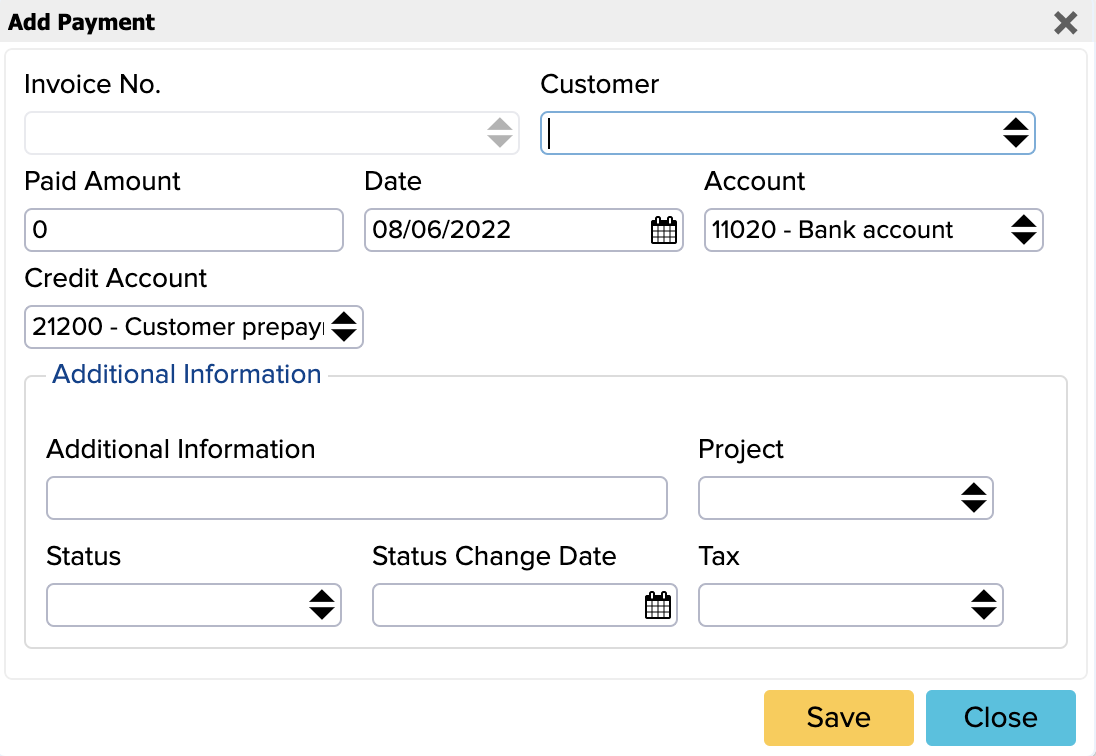
In both cases, without selecting anything, press the blue button ”Add Payment” on the bottom taskbar. In the payment window that opened, add a customer/supplier for each advance payment, the amount of the advance payment (without the minus sign!), the date, and the account. You can also add more information to the payment or connect it to a specific project. Save the payment and repeat the process until all advance payments have been entered.
7. Importing the general ledger
Your general ledger can only be imported into ERPLY Books only if you have also imported your account plan. All accounts in the general ledger must be on ERPLY Books even if you no longer use them (after importing your ledger, these accounts can be deleted). Importing your general ledger means that you are transferring your entire transaction history to ERPLY Books. The module for importing your general ledger is located at Settings -> Initial Data -> Import Transactions. From the same module, you can also import outstanding/unpaid invoices to ERPLY Books (if you have a lot of them).
First, you will need to organise the data. Each entry must be on a separate row and their order should be as follows:
- Account number
- Description (describing the entry)
- Debit (amount)
- Credit (amount)
- Date
Please note! The same data formatting rules apply that are described in the invoice importing chapter. Please make sure that all data is in the correct format.
When your data is organised, save the data as a CSV (Please note! Pay attention to the default file separator) and upload it to the entry import module. Then, on the basis of the contents of the file created, you will need to choose:
- Does the data start on the first row?
- What is the date format?
- Are the decimals separated by a period or a comma? (the symbol separating the integer and the decimal)
- You will only need to change the coding for OpenOffice files – choose UTF-8.
- Choose your file separator. (If you have prepared a CSV file, you were able to choose the separator)
- The ledger type is correct by default.
- Choose the date for which you wish to create a ledger import entry.
- If necessary, choose the project.
In addition, designate the column order on the right – i.e. set the order corresponding to the order of columns in the organised data file. Only then, press Open.
If no accounts appear in the table Accounts at the bottom of this page, the system will show a message that the import was successful. If any accounts appear, however, they have not been imported in ERPLY Books and you will need to add them on this page or the account plan page and save your changes to make sure that the entries of those accounts are imported.
8. Importing fixed assets
The recognition of fixed assets comprises the following steps:
- Acquisition of fixed assets
- Detailing fixed asset items
- Adjusting the residual value of fixed assets
If you wish to recognise existing assets and depreciate them in ERPLY Books, you can do so under Purchase -> Purchase Invoice (Add New) -> Purchase Fixed Assets (Please note! In the case of recognising fixed assets with a regular purchase invoice, these purchases will not be handled as fixed assets automatically).
All fixed assets should be included in the same purchase invoice of fixed assets (a separate item on each line). It is important to add the name of the fixed asset (item column) and the amount (purchase price) and change VAT to 0%. If the amounts match, save; and the fixed assets are now recognised.
Through this process, new fixed asset items were created for you. You can find them under Purchase or Sales- > Purchase and Sale Articles. There, you can filter out items that have the fixed asset type. You can also change its expenditure account (depreciation expenditure account), contra account, and asset lifespan (60 months by default).
Fixed assets can be depreciated on the page Accounting -> Calculate Depreciation. This page shows all fixed assets for a specific period. Always specify a suitable entry date (in the appropriate cell) and remove those fixed assets that you do not want to depreciate at the moment (or at all). Then, when depreciating for the first time, you will need to determine for each fixed asset in the last cell (Depreciation) the number that is formed after the calculation: acquisition cost – residual value = depreciation. They must all be added one at a time and saved after all of them have been added. From now on, you will choose how often and at what value you want to depreciate the fixed assets.
9. Importing opening balances
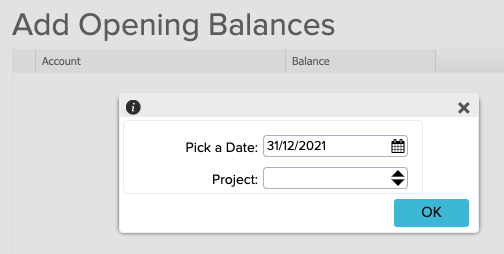
Entering opening balances is generally the last activity in importing data. Opening balances can be entered under Settings -> Initial Data -> Add Opening Balance. Before entering balances, you will need to select the date on which the entry for entering opening balances is made, after which you can edit/add balances manually or copy and paste all balances.
If you wish to use the copying option, you will need to create a list in Excel (or another program) of all your ERPLY Books accounts (in the correct order) and their balances (including those with a balance of 0). ERPLY Books accounts in their correct order can be downloaded from Accounting -> Chart of Accounts by clicking the button bearing the shape of a cloud on the bottom taskbar and selecting the Excel file format.
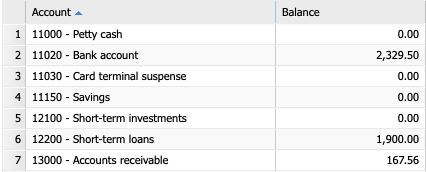
Then, add the balance of each account (on the corresponding date) after the account, copy all added balances, go to the Enter Opening Balance page, select the first cell (click on the name of the first account to turn it blue and right-click on that account’s balance cell) and press Ctrl + V to paste the balances. Then save.
If you want to change your account balances in the future, you can do this at the same place. Simply select the appropriate date and change the required balances. Each new entry overwrites the previous balances and the system takes into account the balances that were added/changed last.
Additional information: Importing receipts and payments
We recommend managing receipts and payments through bank imports. If you wish to label the majority of outstanding or unpaid invoices as received/paid (because they have already been received/paid), there are two ways to do so:
- If you search ‘‘Mark Sales Invoices as 100% Paid (Multiple at Once)’’ or ‘’Mark Purchase Invoices as 100% Paid (Multiple at Once)’’ in the search box of the home page, you will have the option to open certain invoices and let the system to label them as paid (the instructions are displayed in the window that opens).
- Create a file with organised data and use it to label the invoices as paid in the module Settings -> Initial Data > Import Transactions.
Here is a more detailed description of the second option. The data in the file must be in the following order:
- Date
- Customer or supplier
- Amount received/paid
- Item (the description added to the receipt)
- Account number
Please note! The same data formatting rules apply that are described in the invoice importing chapter. Please make sure that all data is in the correct format.
When your data is organised, save the data as a CSV (Please note! Pay attention to the default file separator) and upload it to the entry import module. Then, on the basis of the contents of the file created, you will need to choose:
- Does the data start on the first row?
- What is the date format?
- Are the decimals separated by a period or a comma? (the symbol separating the integer and the decimal)
- You will only need to change the coding for OpenOffice files – choose UTF-8.
- Choose your file separator. If you have prepared a CSV file, you were able to choose the separator)
- The ledger type is correct by default.
- Choose the date for which you wish to create an import entry for receipts/payments.
- If necessary, choose the project.
In addition, designate the column order on the right – i.e. set the order corresponding to the order of columns in the organised data file. Only then, press Open.
If no accounts appear in the table Accounts at the bottom of this page, the system will show a message that the import was successful. If any accounts appear, however, they have not been imported in ERPLY Books and you will need to add them on this page or the account plan page (and save your changes) to make sure that the entries of those accounts are imported.
You can find more information about importing data from the following video: