Unifiedpost e-invoices
Opening ”Settings-> Integrations” go find Unifiedpost and click on ‘’Manage’’. Then open the window where you need to write username and password and click on ”Save” button.
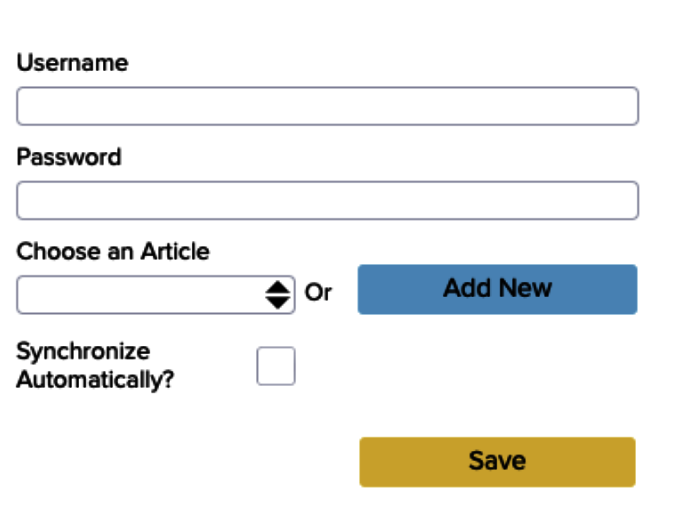
If you don’t know where you can get your username and password ask help from the Unifiedpost user support. When the username and password is added then the integration is created.
When you move to ”Sales -> Sales Invoices” and open the invoice you want clicking on an envelope image. Then you can send your sales invoice straight to Unifiedpost (Fitek). You have to click on the ‘’Send’’ button above and choose ‘’Fitek’’.
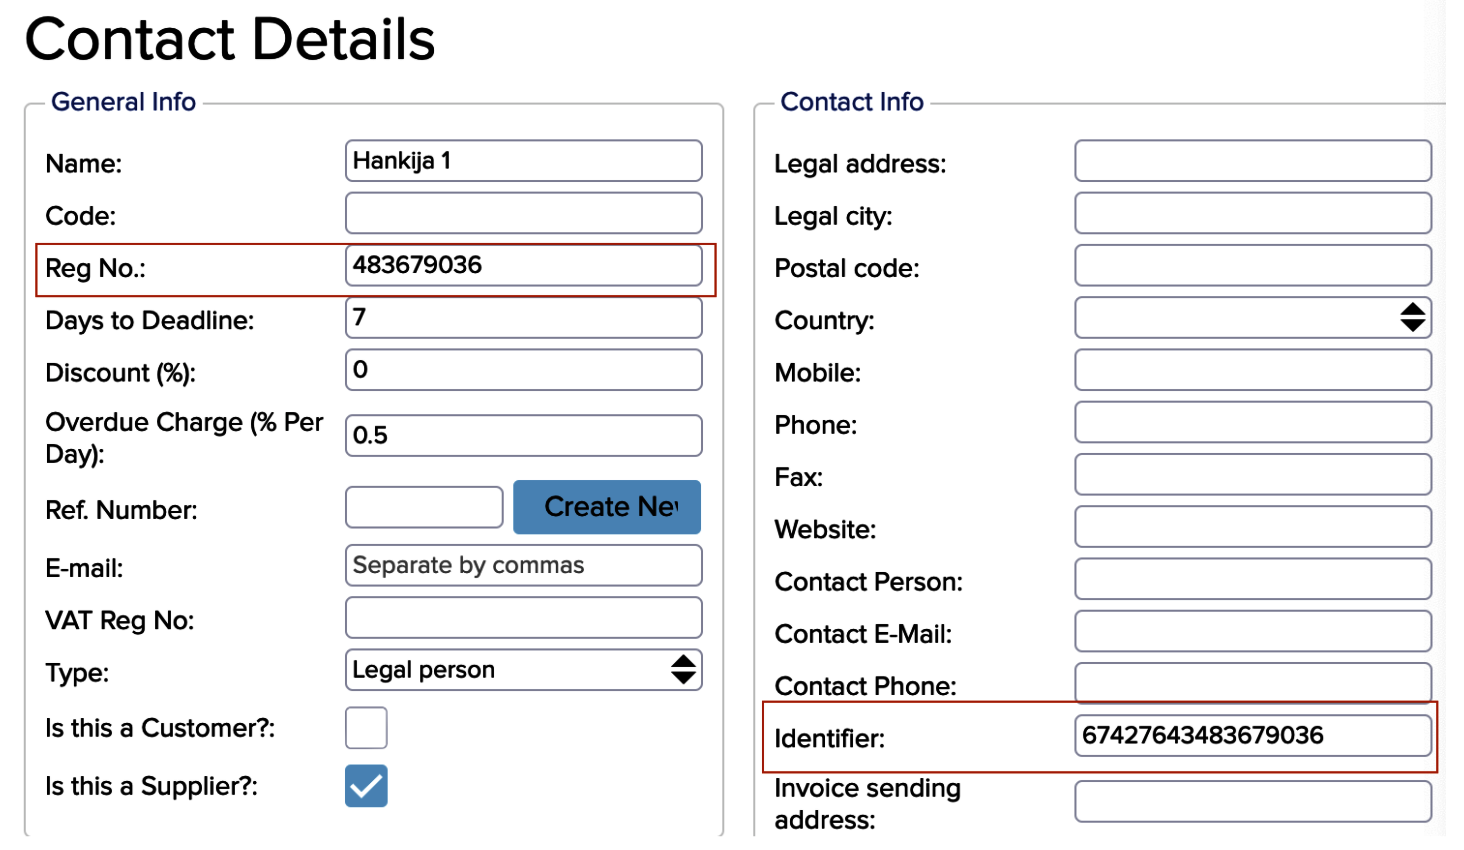
When you search Global Parameters on the Dashboard you can see there is a global named ATTRIBUTE_GLOBAL_ADD_EINVOICE__SERVIDE_ID. That global is important because Unifiedpost needs a unified customer database for the public sector customers. If it’s a public sector organisation then it is important to have an ID that differentiates which organisation the invoice is coming from. You can add an ID to ‘’Identifier’’ cell in Contact Details. Contact Details are shown when you click ”Sales -> Contacts” and click in front of the customer name on i letter.
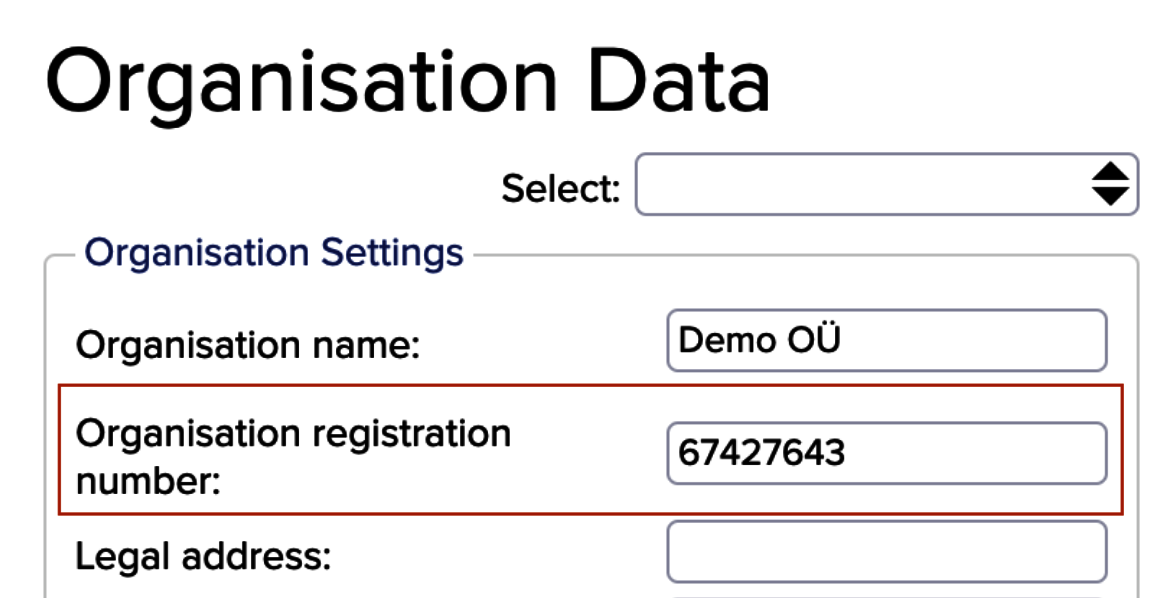
First add to the indicator cell your company’s registration number and then add customers registration number (or identification number in the case of a private person). Now it is impossible to differentiate customers by identifier number.
- GLOBAL_USE_EINVOICE_VERSION12 – when this global is not added then we send the Unifiedpost invoice with version 1.1. Here you should ask from your Unifiedpost manager which version invoices you are using. In Estonian e-invoices standards are at the moment used three different versions (1.0, 1.1 and 1.2).
- GLOBAL_ADD_ALL_BANK_ACCOUNTS_EINVOICE – this global adds all your different bank accounts to e-invoice what you have added in Settings -> Organisation Data. If that global is not added then on the invoice is shown only one bank account (the default).
- GLOBAL_ADD_ATTACHMENT_TO_EINVOICE – this global adds PDF to the invoice
If the company has their own server in Unifiedpost (for example large companies are using individual Unified servers) you can add your own URL like that:
- Name = ATTRIBUTE_GLOBAL_FITEK_LIVE_URL
- Value = corresponding URL
- The default URL is https://www.arved.ee/b2b/services/iWS-Invoices?wsdl
If the integration is done then go find Unifiedpost under the integrations (”Settings -> Integrations)” and click on ‘’Synchronize’’ and there you can sync purchases invoices. If you are sending purchase invoices then you can do that on the invoice (described above) or you can use Invoice Scheduler. You can learn more about the Invoice Scheduler HERE.
If you want to use purchases invoices in Unifiedpost and connect it with the ERPLY Books Chart of Accounts then open ”Accounting -> Chart of Accounts” and you can download accounts CSV file and then upload them to Unifiedpost.
If you have further questions, please contact us at info@erplybooks.com.