Adding an invoice date
When creating a new purchase invoice, you can add dates. Let us open a new purchase invoice, for example (Purchases -> Purchase Invoice).
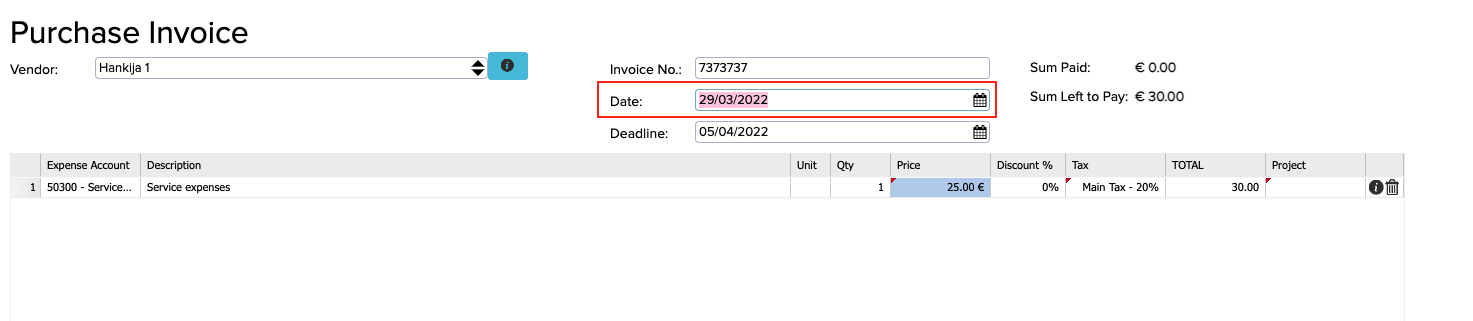
First you have to fill the Vendor cell and then Books will activate the Invoice number cell. Add an invoice number and press the “Tab” key on your keyboard. Now the Date cell is active.
For example, if it is March at the moment, then writing 15 in the cell and pressing the “Tab” key fills the Date cell automatically with the current month’s date.

If you want to write a month and a date (for example 15 February), then write in the cell 1502 and press the “Tab” key.

Books fills the cell automatically with the date 15/02/2022.
If you want to add last year’s date, you have to write for example 150221.

By pressing the “Tab” key again, the date cell is filled with the correct format as 15/02/2021.
Adding the invoice deadline
The deadline cell has one additional condition. On purchase invoices, instead of the payment deadline you can simply write 10 days, for example. In Books you can just write +10.

When we move to another cell, we can see that 10 days were added to the date automatically.

You can change the date format in Configuration (Settings -> Configuration).
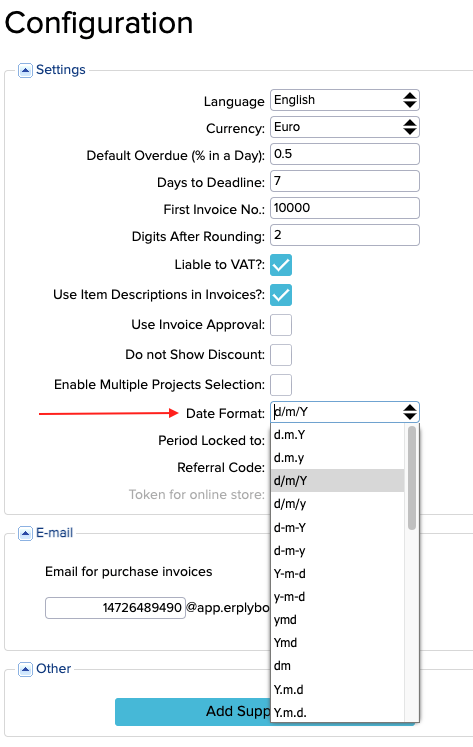
In the date format:
Y- indicates the year written as 2022
y- indicates the year written as 22
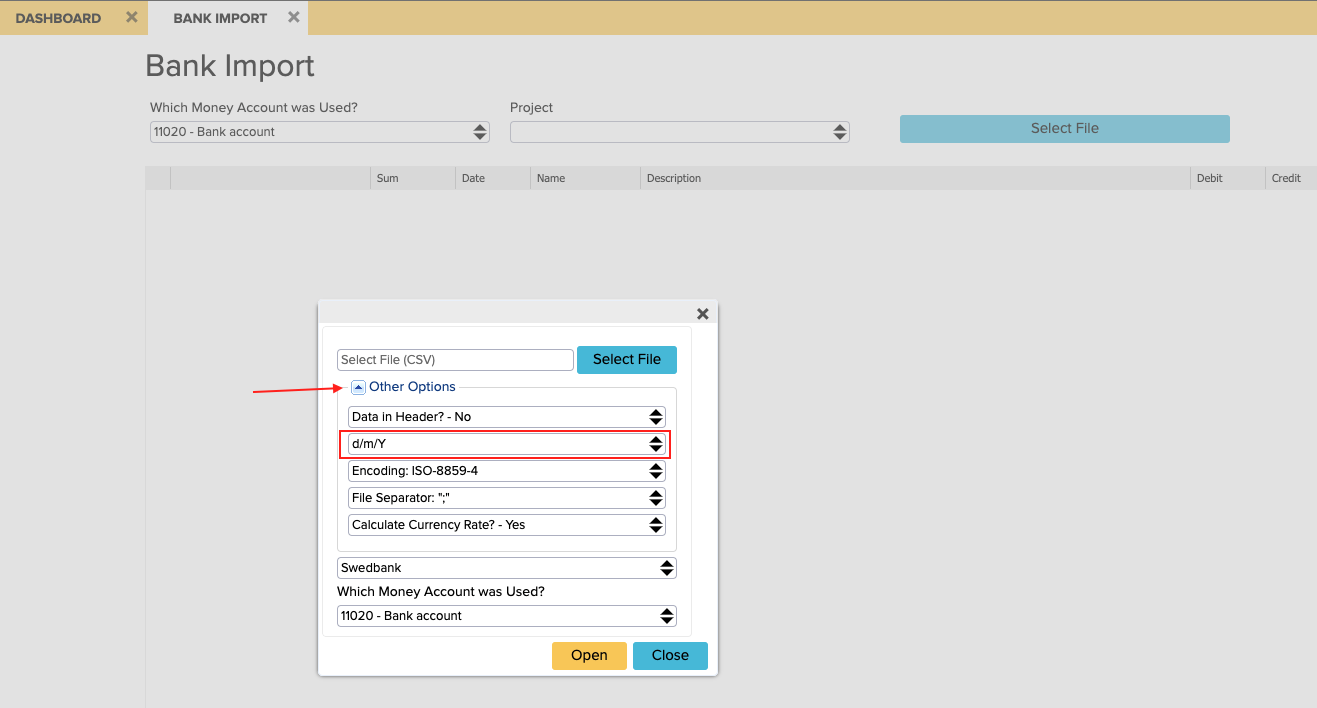
In the Date format cell, you can also select the hour and minute date format. This format is not used on invoices usually but this is necessary for the bank import.
Open the bank import and click on “Select File” and under “Other Options” you can change the bank import date format.
The date format is also important on invoices and for transactions import. You can see this if you open Settings -> Initial Data -> Import Transactions and under Other Options you can also see the date format cell.
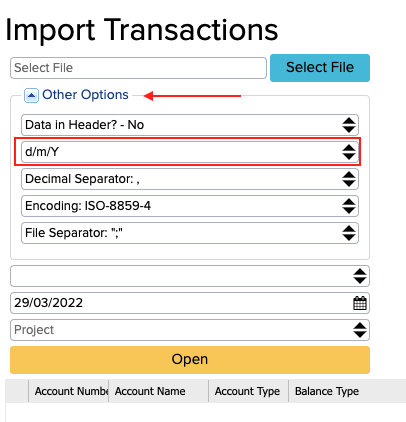
- If you are copying data from Excel, then the date format in ERPLY Books has to be the same as it is in Excel.
Date ranges
In ERPLY Books, you can add invoice maximum dates one year after the initial creation date by default.
For example, open a new purchase invoice (Purchases -> Purchase invoice) and add the maximum date in the date cell. For example, if today is Tuesday 29.03.2022 then we can see that the maximum date we can add on the invoice is Wednesday 29.03.2022.

It is necessary for scheduling payments. For example, you can buy insurance for one year at a monthly cost – payments are divided into 12 parts, so the entries are also spread over several months.
If you need to divide some costs over a longer period of time, for example to 2 years, then you can add a maximum future date. Open Configuration (Settings -> Configuration) and find the setting named “Max days in the future”.
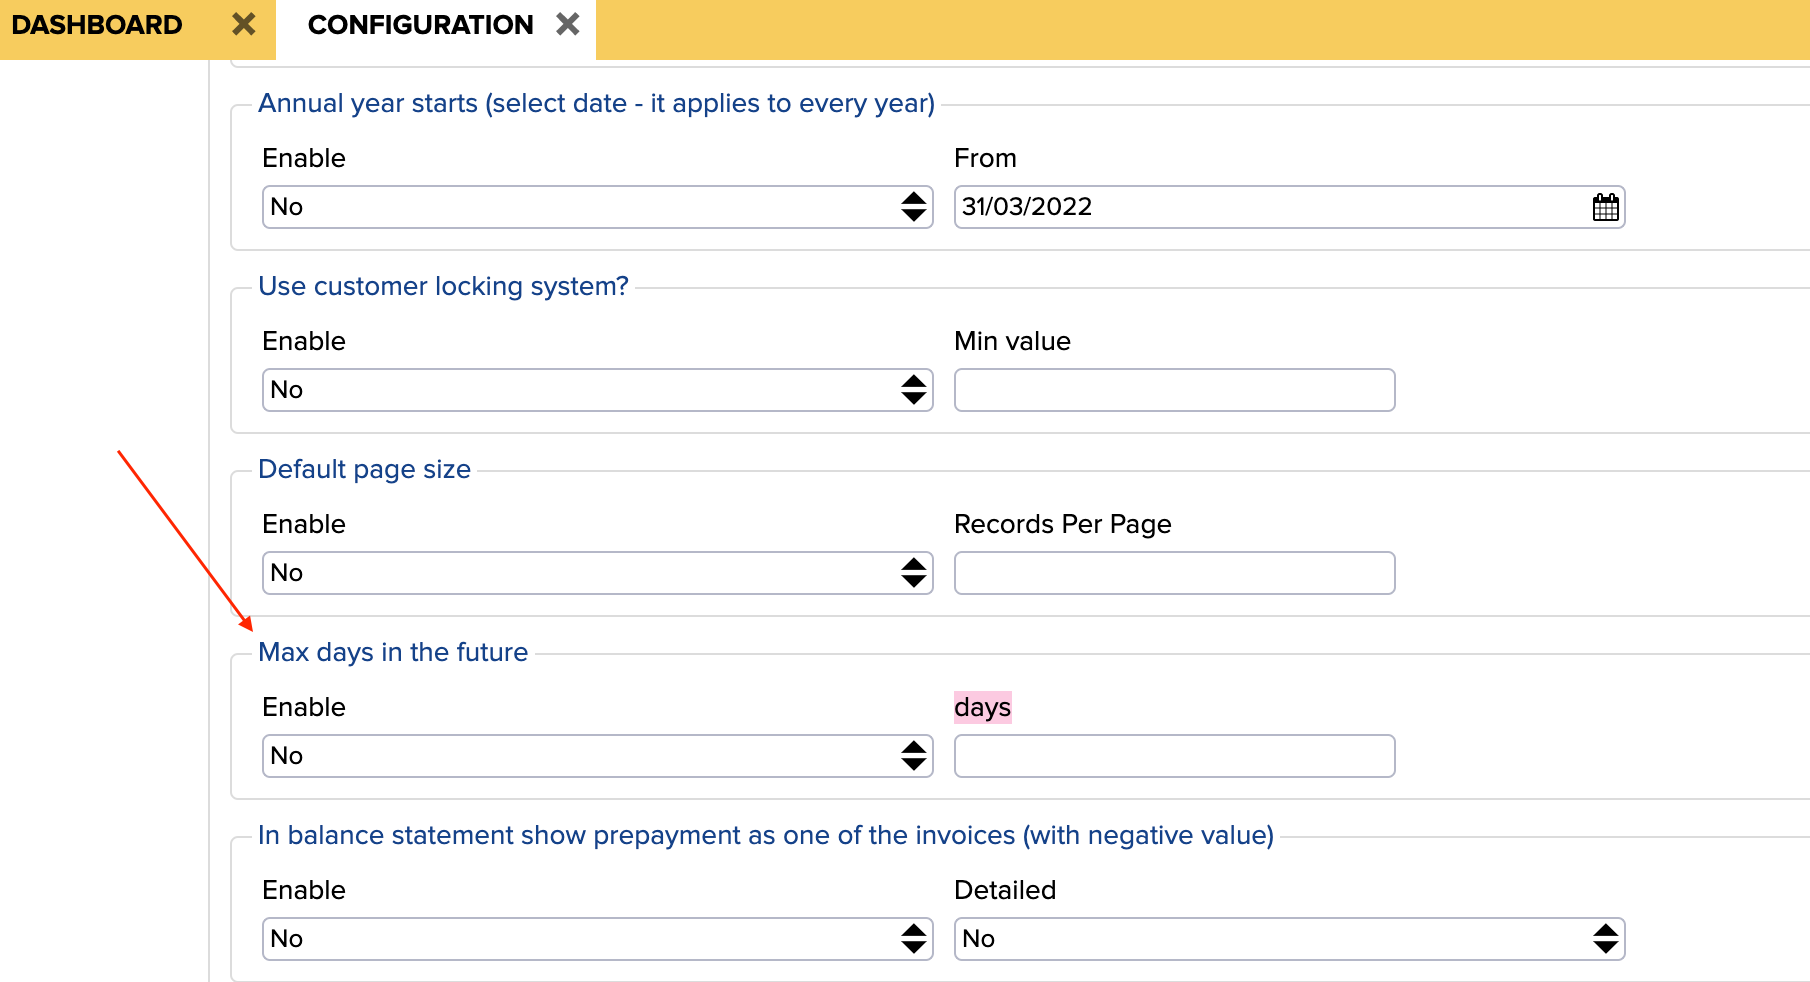
Here you can add the number of days when you want to make transactions in the future (for example, if you want 1,000 days in the future, it is 3 years). If you do not enable this rule, then the maximum time is 365 days by default.
The period beginning date is when the organization’s selection is locked and this is written in the “Period Locked to” cell.
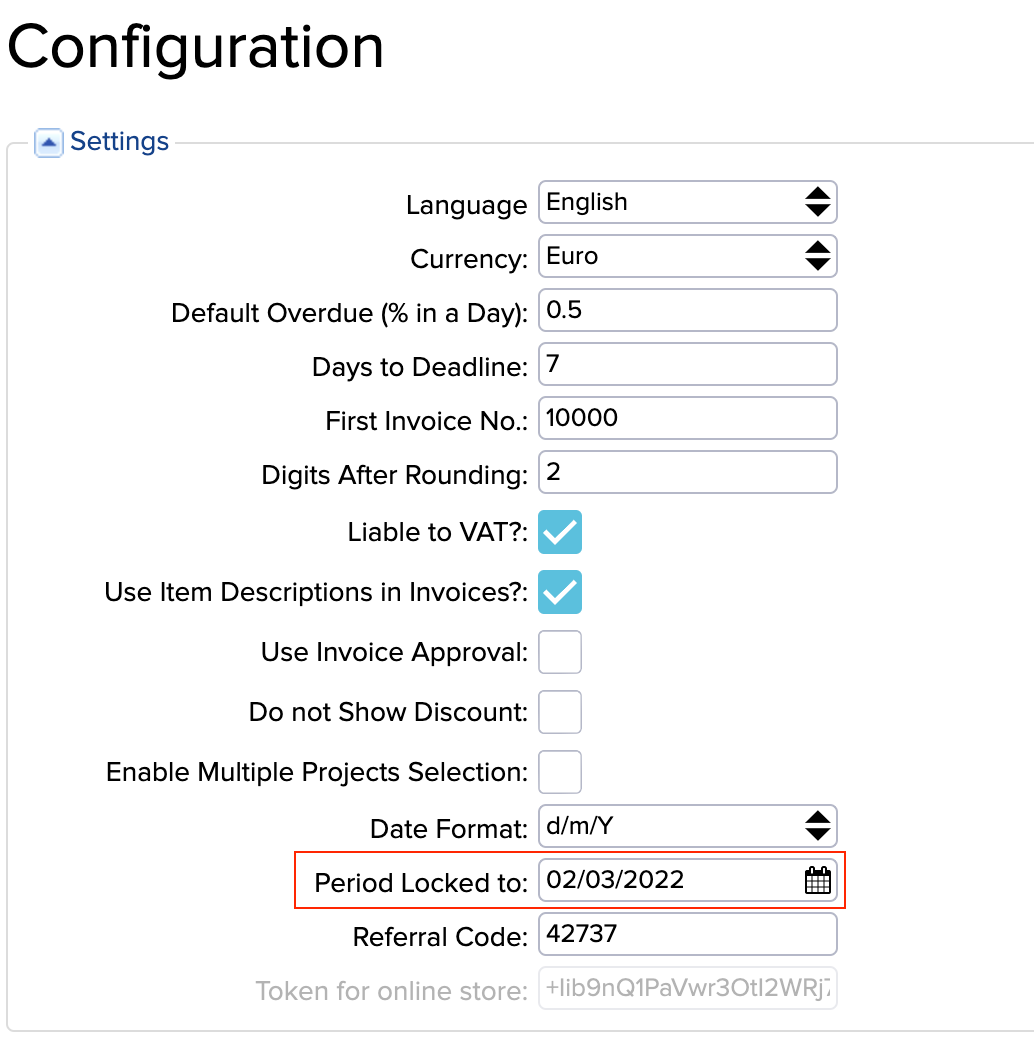
The Period Locked date can depend also on the accounts in the transaction, for example if some accounts are locked in the chart of accounts. Here you can find further information about that.