Purchase order
What is a purchase order and in which cases is it used?
Purchase orders can be used if you want to order something from a supplier, for example. In ERPLY Books, purchase orders can also be used in waste management – it is possible to create purchase orders based on incoming cars and to issue invoices later.
Activation of purchase orders
To activate purchase orders, open Global Attributes and add a new rule:
- Name: GLOBAL_SHOW_PO
- Value: true
Then save the changes, log out and back in.
Creating a purchase order
To create a purchase order, find “Purchases -> Purchase order” from the menu bar at the top. The purchase order that opens looks like an invoice. After entering the purchase order information, be sure to save it.
There are several ways to view purchase orders:
- In the purchase invoices module (”Purchase -> Purchase invoices”)
- In the unpaid purchase invoices module (”Purchase -> Purchase invoices -> Unpaid purchase invoices”)
- In the orders module (”Sales -> Orders”)
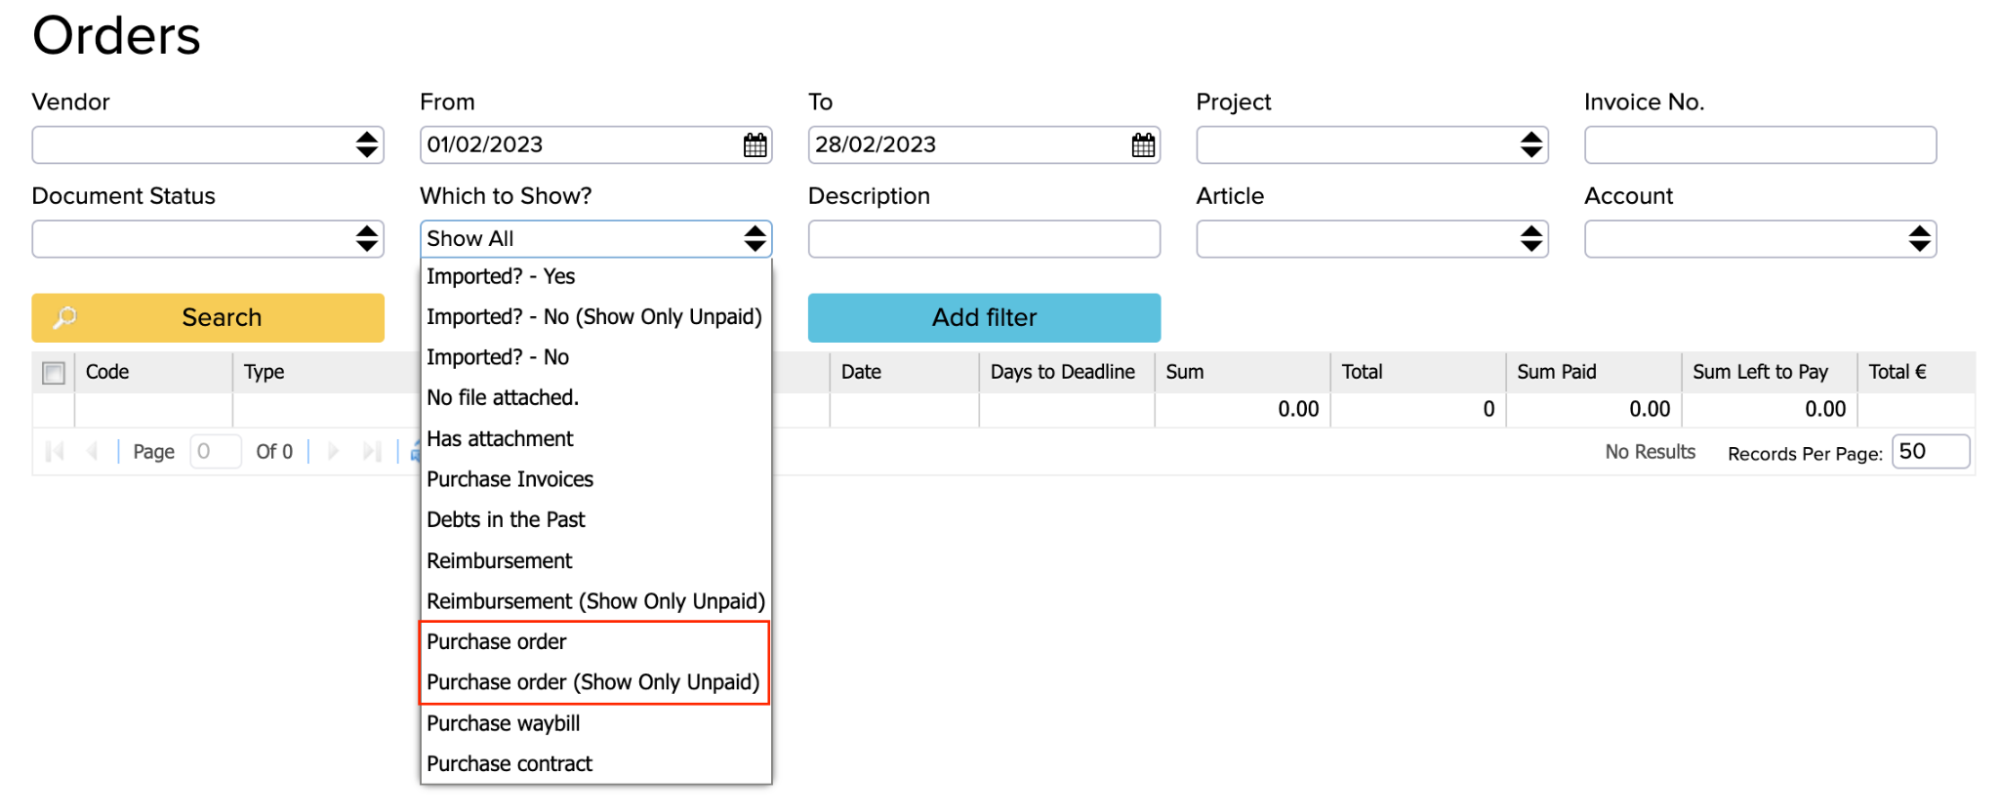
To see purchase orders, select “Purchase order” from the “Which to show?” box and press Search, then the purchase orders will be displayed.
How to create an invoice from a purchase order?
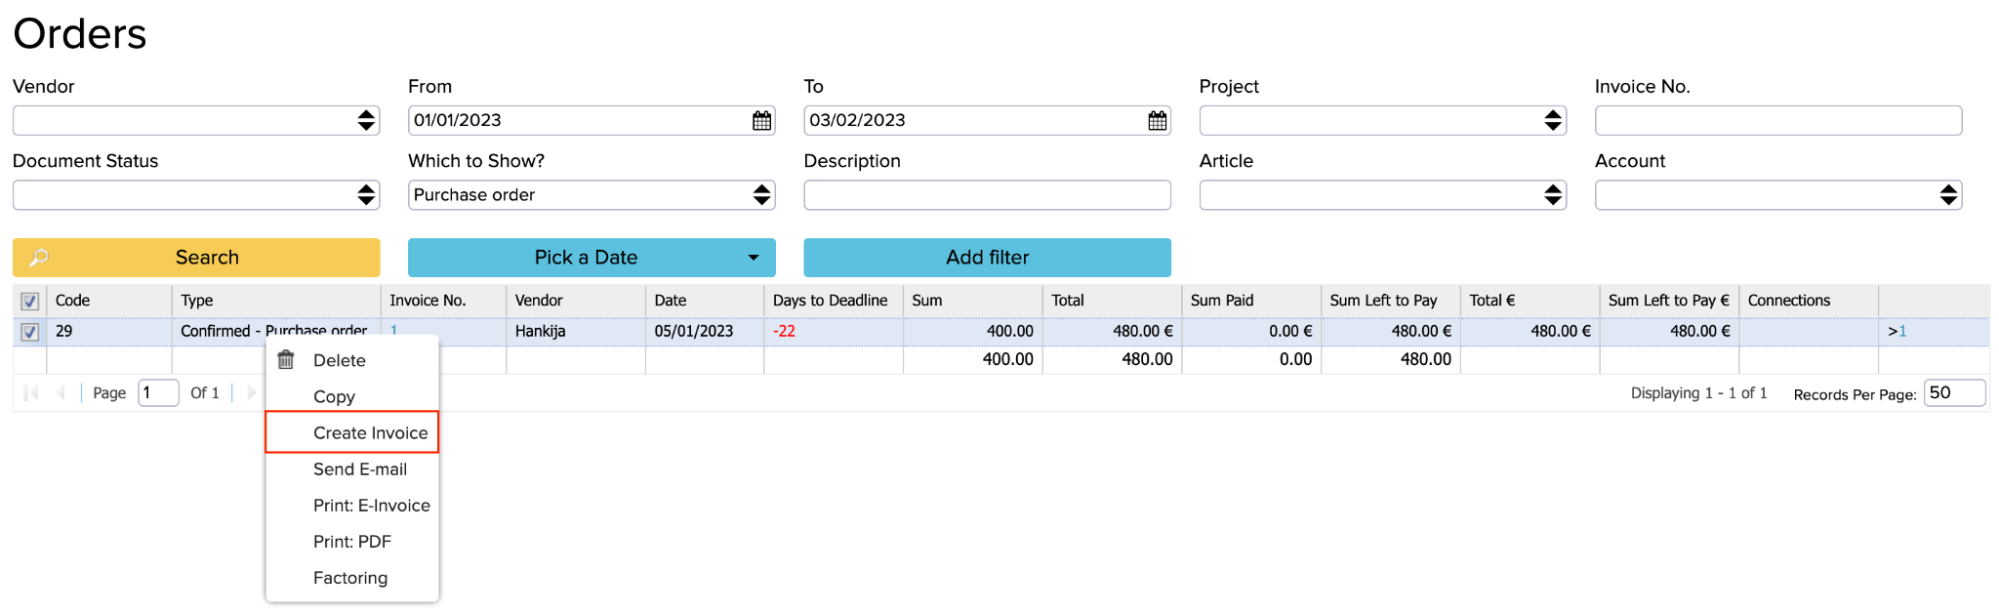
To create an invoice from a purchase order, open the menu “Sales -> Orders”. From there, select “Purchase order” in the “Which to show?” box and press the Search button, then all purchase orders created will be displayed.
There are several ways in which you can create an invoice from a purchase order:
- Select the desired purchase order line (with a check mark) and select “More -> Create invoice” in the bottom right-hand corner
- Right-click on the purchase order line and select “Create invoice”
- Open the purchase order with a double click and press the blue “Create invoice” button:
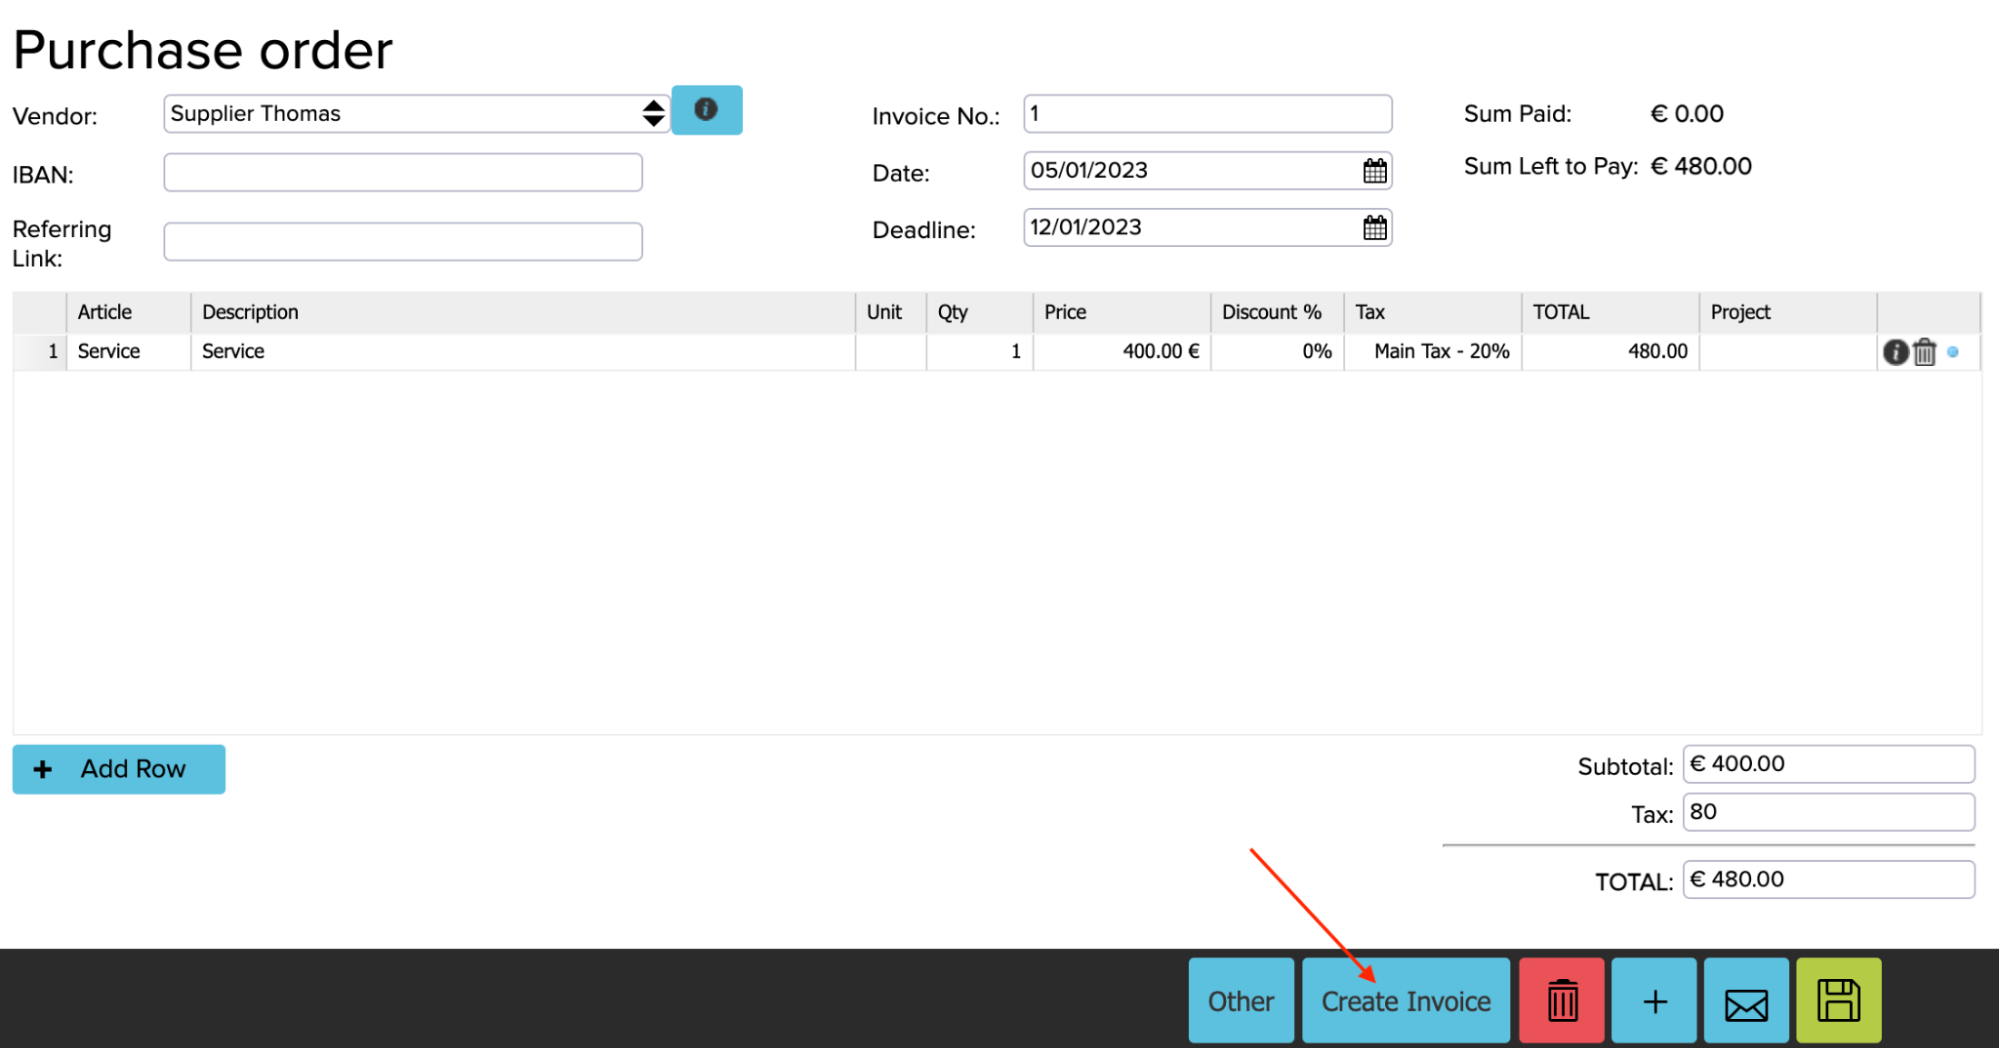
A purchase invoice will then be displayed so you can enter the necessary information and finally save.
How to add a payment on a purchase order?
A payment can be added on purchase orders in the same way as on invoices:
- Simply add a single payment on the purchase order
- Create a payment file and send it to the bank
Adding a single payment
Both adding a single payment and creating a payment file can be done in the Open Payables module. You can open the Open Payables module by selecting “Purchase -> Purchase invoices -> Open Payables”.
To find purchase orders, select “Purchase order” in the “Which to show?” box.
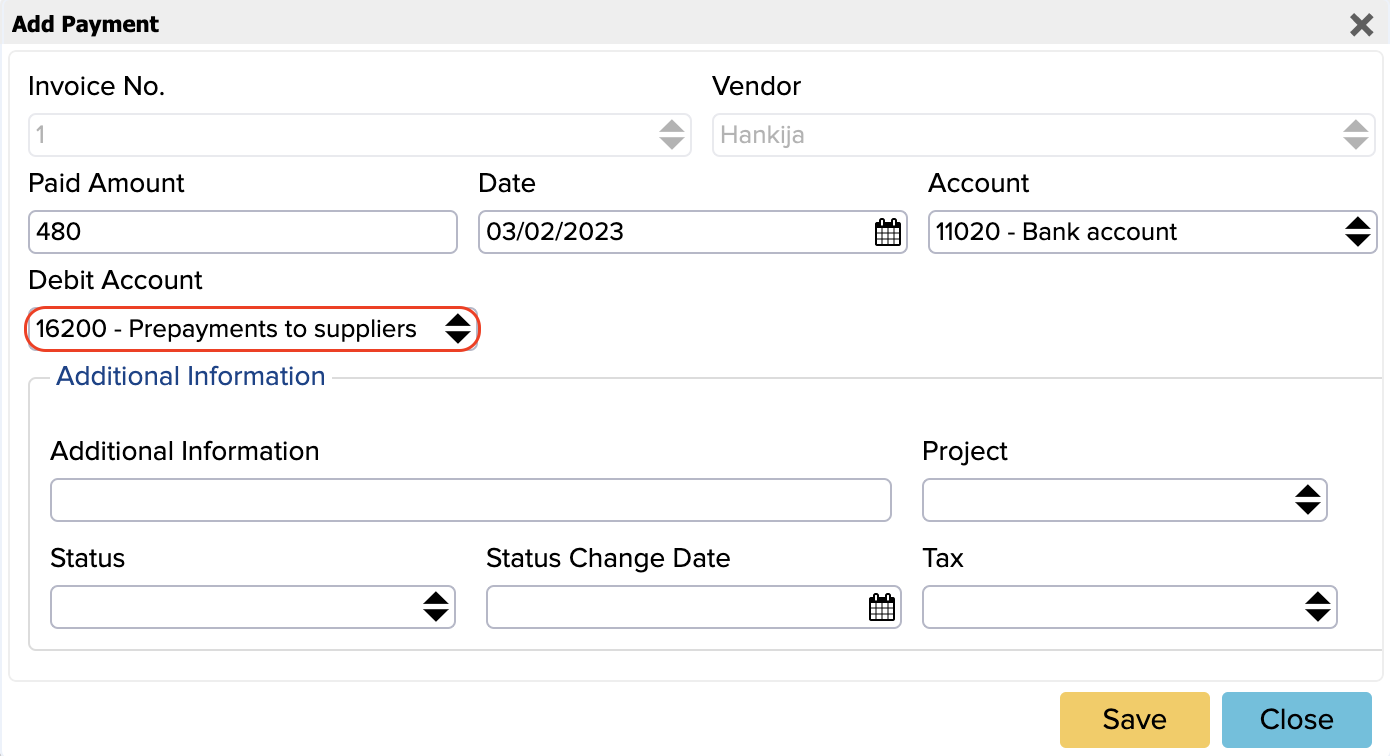
Tick the purchase order row on which you want to add the payment and click “Add payment”:

In the opened window, you can add the payment amount, account and other relevant information.
NB! The payment of the purchase order will create a prepayment and that is why the default debit account here is “Prepayments to suppliers”.
Creating the payment file
If you want to create a payment file from several purchase orders, this can also be done under the Open Payables module.
- Open the Open Payables module (“Purchase -> Purchase invoices -> Open Payables”)
- Select the purchase orders from which you want to create a payment file
- Click on “Create payment file”
You can find more information about creating a payment file here.
How to synchronize purchase orders from the warehouse?
If the purchase orders are created in the warehouse and now you want to synchronize them to ERPLY Books, you need to add a rule.
To add the rule:
- Open Global Parameters from the search field on the main page
- Add a new line:
- Name =ATTRIBUTE_ERPLY_SYNC_NON_ACCOUNTING_DOC
- Value =true
- Altvalue -> if you write “true”, non-accounting sales documents will not be synchronized
- Altvalue2 -> if the cell is not empty, you can add the ERPLY client ID that you do not want to synchronize
If you write “true”, non-accounting purchase documents will not be synchronized
- Altvalue3 -> if the cell is not empty, it must contain the values of the type you want to synchronize
If you want to synchronize all non-accounting documents, activate rule 21. “Sync non-invoice inventory transactions with inventory transaction date?” needs to be activated under the ERPLY checkout and warehouse settings.
![]()