Fixed assets
This manual is compiled to explain operations with fixed assets in ERPLY Books. It will describe how to purchase and amortize fixed assets and how to register small assets.
Purchasing or registering fixed assets
Purchasing fixed assets is a regular purchase deal. The module is the same for purchasing or registering fixed assets. You can get there via: Expenses (Add new) → Purchase fixed assets. Similar to importing other data, you can import data here from an Excel table.
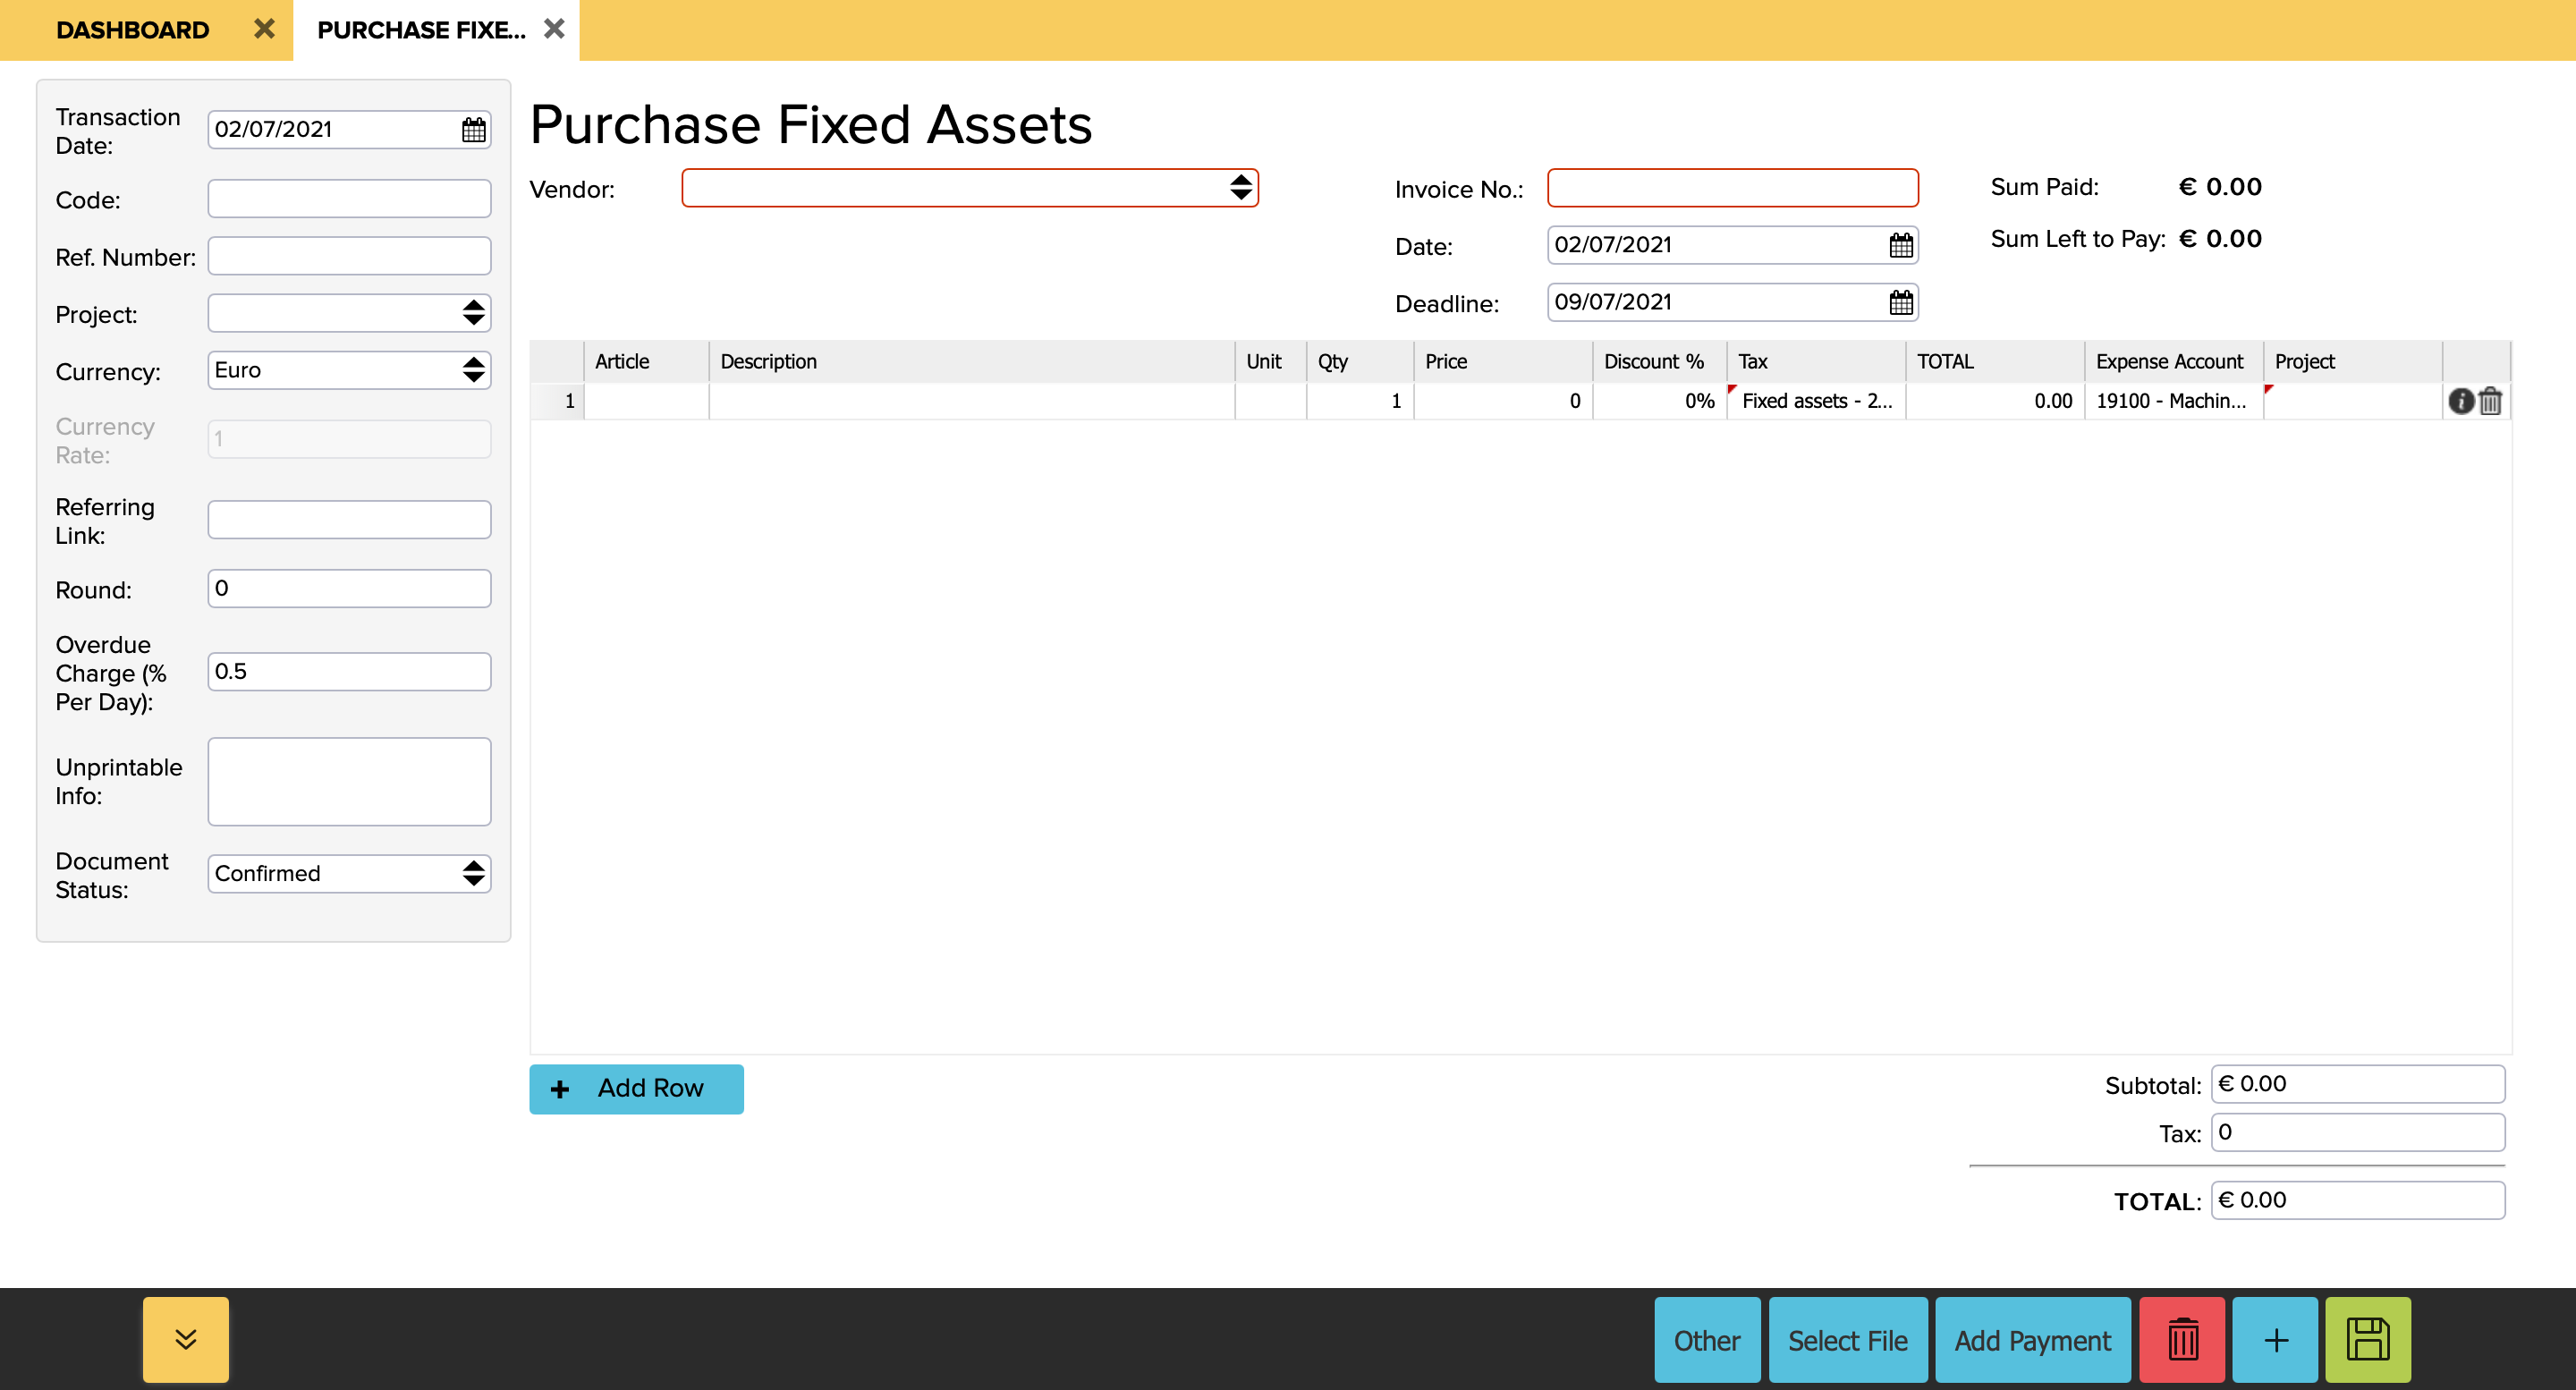
Fill out the following forms in the new purchase invoice that opens when you are purchasing fixed assets :
- Vendor – the company where the fixed asset was purchased;
- Invoice no. – as written on the invoice;
- Article – name of the fixed asset;
- Price – purchase price of the fixed asset.
The system will automatically add tax rate. Additionally, the expense account will be marked as an inventory account. Different fixed assets should be added to separate rows. New rows can be created with down-key or with the button ‘Add row’. If everything is fixed, save and do the payment (‘Add payment’).
If you wish to register fixed assets, you have to do all the operations as stated previously with some differences:
- All fixed assets must be added to the same invoice (separate rows);
- Supplier – company that registers the fixed assets;
- Invoice no. – You can create it by yourself;
- Description – name of the fixed asset;
- In tax form mark 0%. During the purchase of fixed assets You have already paid tax and You do not have to do it again upon registration.
It is recommended to mark the same date that is on the invoice as the payment date of the invoice.
Where can the company’s fixed assets be seen?
The company’s fixed assets can be seen via ‘Accounting’ → ‘Fixed assets’ and by selecting a suitable date range and pressing ‘Search’.
Fixed asset sheet
To see the created fixed assets, you can go to the ‘Purchases and Sales articles’ module. You can find it in ‘Purchases & Expenses’ → ‘Purchases and Sales articles’. In an automatically created fixed asset, the account that was stated when purchasing will be changed to an inventory account and the depreciation system account will be taken as an expense account.
By marking a preferred fixed asset and pressing the button ‘article sheet’, you can see general information about the selected fixed asset. An important form in the article sheet is ‘Asset life in months’. By default, a product’s optimal lifespan is five years or 60 months. In per cents one year equals to 20%, which shows how much the product will depreciate in one year. If you wish to determine the product’s depreciation once a year, you have to add the number of years (two, three, four…) to the form ‘Asset life in months’.
How to change fixed asset accounts?
If you wish to change fixed asset accounts, you can do it in Settings → Initial data → System Accounts, where the depreciation account already exists. The debit account is the expense account that automatically comes from the article sheet. The credit account is a fixed asset’s depreciation contra account which has a corresponding system account.
Calculating depreciation
If the fixed asset is purchased/registered, depreciation must be calculated. The ‘Calculate depreciation’ module can be found in the ‘Expenses’ menu. The module has 3 parts. The upper part (From-To-Project- Expense account) contains a search bar where different fixed assets can be searched. The middle part (Date of transaction- Project) enables to change the transaction data. Finally, below them is list of fixed assets with various data.
If you have the correct lifespan marked in the article sheet when you are purchasing fixed assets, the system will automatically calculate the depreciation for every month or year. All you have to do is press the button ‘save’ in the depreciation module in the end of every month.
You can also change the lifespan of assets manually in the depreciation module but it is more reasonable to fix it in the article sheet (as described before). When changing the lifespan, you must take into consideration that there is never a situation when the assets’ lifespan is 0 months.
When registering fixed assets, user must change the depreciation (last row) manually for every fixed asset. Cumulative depreciation sum must be added to every fixed asset, which will automatically correct the asset’s lifespan. NB! The same date that is on the invoice of the registration of fixed assets must be marked as the date of transaction!
Example
How to calculate depreciation for fixed assets that were purchased in December and the calculation takes place in December, but you would like the December ones not to be calculated?
For that you need to do following search first before the calculation:

Where can you see depreciation transactions?
They can be seen via Accounting → Transactions and selecting depreciation transactions from the column ‘Type’. From there you can see how they are depreciated. Another option is Reports → Article report, where you can filter out all the depreciated rows.
How to keep from double depreciation of fixed assets?
If fixed assets or small assets, for which depreciation must be calculated, have been purchased/registered after calculating depreciation then rows of assets already depreciated must be deleted in the module Accounting → Calculate Depreciation. You can filter out all the rows that have been changed. Those you do not want to calculate the depreciation for at the given moment by searching fixed asset depreciation account in the expense account form.
How to depreciate fixed asset by 100%?
If you wish to depreciate a fixed asset’s balance by 100%, add the same sum that is in the balance form to the depreciation form.
Automatic depreciations calculations
In ERPLY Books it is possible to configure automatic depreciation calculation. It means that with this configuration the software automatically calculates depreciation for the last month on the specified date.
For that search ‘’Automatic depreciation calculations’’ from the dashboard search. Click on the blue ‘’Add’’ button to add new row and fill the columns with the following information:
- Day of month: day of month when the depreciation will be calculated
- Subject: email subject
- Email text HTML: email content in HTML
For example: Hello!<br><br>Last month’s depreciation was calculated!<br><br>Best wishes
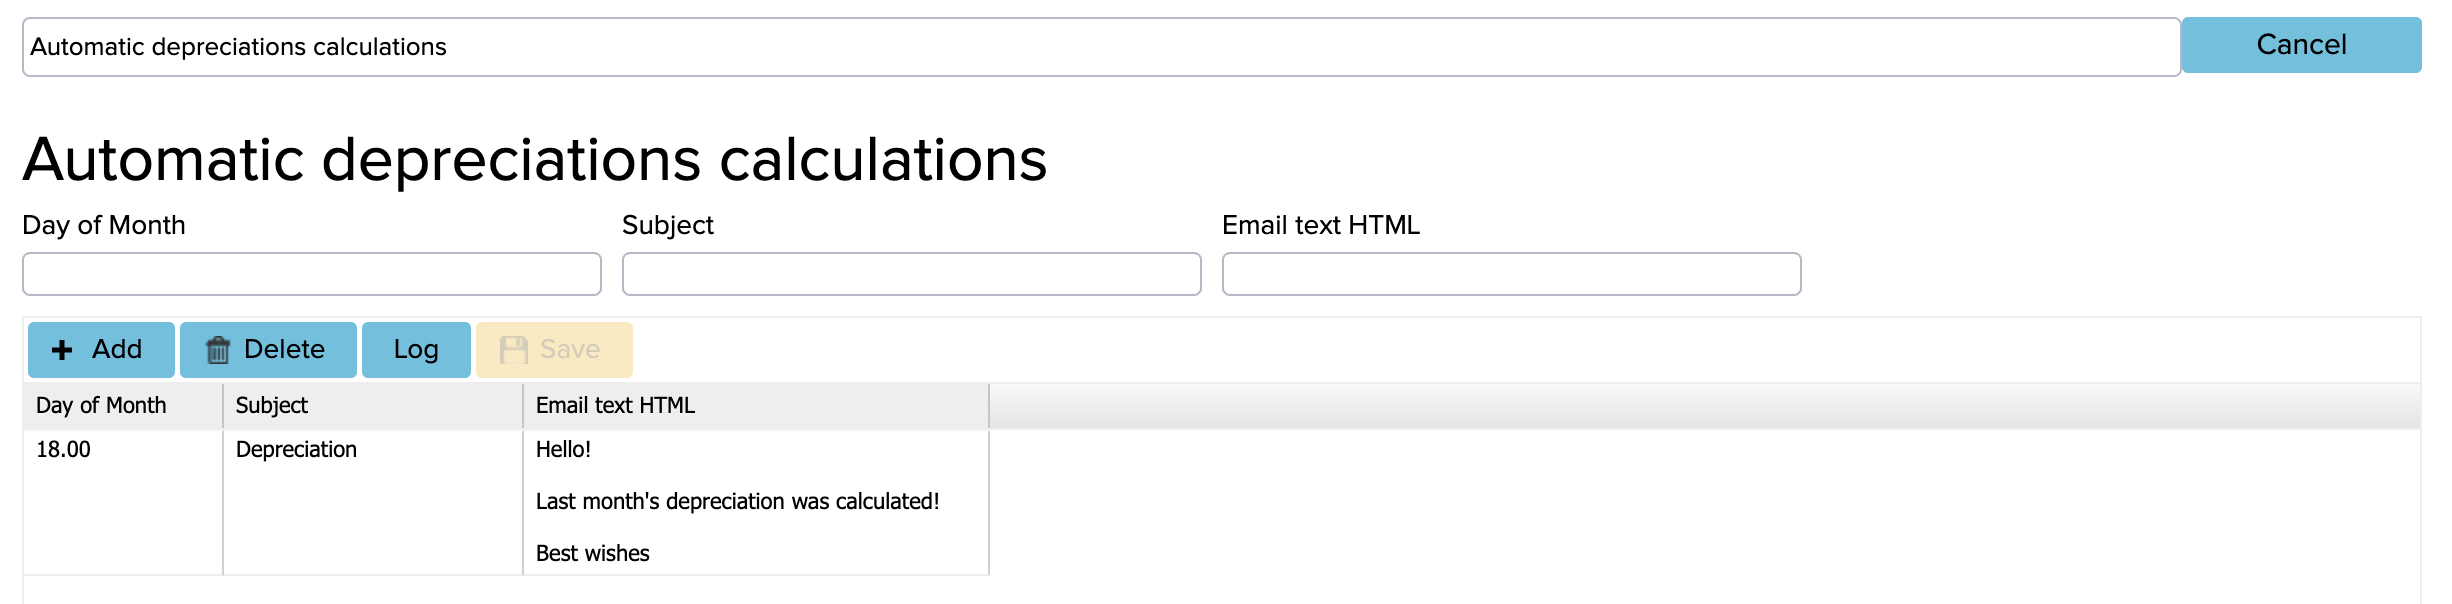
At last save the changes by clicking on the yellow ‘’Save’’ button and log out of your account and then back in.
Registering small assets
First, You can calculate other small assets similarly to fixed assets in their module (Expenses → Purchase invoice (Add new) → Purchase Fixed Assets). The given module is necessary for the system to create a new fixed asset sheet from which new transactions can be made. Fill out the opened purchase invoice the same way as when purchasing fixed assets. The only difference is that if you wish this purchase to appear as expense straightaway, you have to choose the form ‘Small assets expense’ from the Expense account.
You can check where the added expense is located. For that go to Calculate depreciation module (from Expenses menu). There you can see the small asset that was just added is on the fixed assets list and it has the same debit and credit account as the other fixed assets. If you do not want to use these accounts, they can be edited from Expenses → Purchases-sales articles, where you can set other expense accounts, for example ‘Small assets Expense’.
How to increase the value of a fixed asset?
Possible ways to increase the value of a fixed asset:
- The fixed asset was purchased with several payments:
- There are two options which differ according to how you wish the fixed asset to be shown:
- First, if you wish to see the purchase price of the fixed asset increased, you have to open the first invoice, increase the price of the fixed asset and add a negative service row to the invoice (which changes the sum of the invoice back to as it was initially). You can add the same account you used to add the negative row on the second purchase invoice.
- Secondly, if the previous is not important, you can manually change the depreciation sum to negative – do depreciation only to the given fixed asset article by manually writing over the depreciation sum that is in the end of the table.
- There are two options which differ according to how you wish the fixed asset to be shown:
- The fixed asset is created by oneself:
- If the fixed asset is created by oneself then it is recommended to follow it with a project. For example, building a house means several purchase invoices, wages and other expenses. Adding a corresponding project to every transaction means that it is easier to get to know the purchase price of the fixed asset afterwards. After this, all expense can be considered registered as a fixed asset. Registering is the same as described in this manual previously, although corresponding expense accounts are set as payment accounts.