Early payment discount
If you have a global named GLOBAL_USE_EARLY_PAYMENT, you also have to add additional fields on the invoice, which you can do from Settings -> Configuration. When you scroll down, you will see “Additional attributes for modules”.

Then, you need to add two additional fields by pressing the Manage button: EARLY_PAYMENT_DISCOUNT_PERCENT and EARLY_PAYMENT_DISCOUNT_DAYS.

EARLY_PAYMENT_DISCOUNT_PERCENT
In the Operation column select “invoice”
In the Type column select ACTIVITY_ITEM_NUMBER
In the Attributes column write EARLY_PAYMENT_DISCOUNT_PERCENT
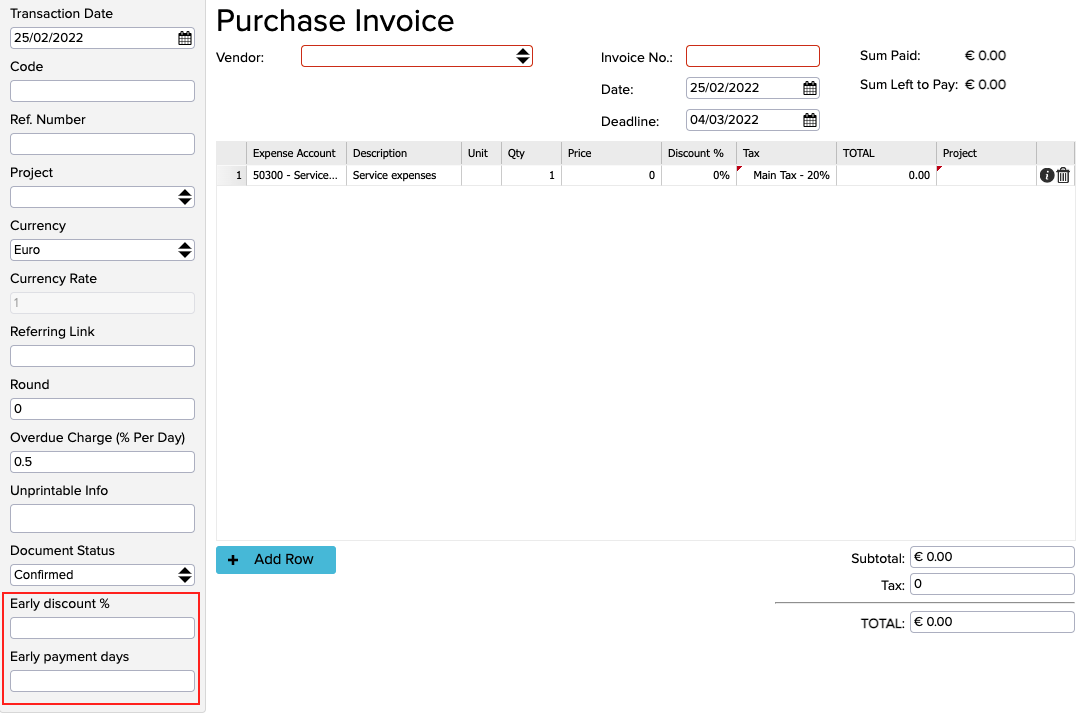
In the Name column write Early discount %
In the Type column select “Value”
EARLY_PAYMENT_DISCOUNT_DAYS
In the Operation column select “invoice”
In the Type column select ACTIVITY_ITEM_NUMBER
In the Attributes column write EARLY_PAYMENT_DISCOUNT_DAYS
In the Name column write Early payment days
In the Type column select “Value”
This means that if you pay earlier than this number of days before the deadline, then you will get this amount of discount. You can set the “Early payment %” and “Early payment days” for each purchase invoice.
This is the manual way of adding an early payment discount. However, you can also set this up by supplier name and the system will then automatically set these two attributes (“Early payment %” and “Early payment days”) when saving an invoice.
Adding an early payment discount does not change the value on the invoice because you have to pay the Value Added Tax (VAT) and by changing the value on the invoice you would be getting less in taxes, which you later claim back on the purchase side. This is why you need to add a second payment on the invoice.
If you go back to the globals, you will see a global named GLOBAL_USE_EARLY_PAYMENT. If you write ‘’True’’ to the Value column then you are just using the feature and can add the discount manually on the invoice. But you can also add the account ID in this column to link it with the correct account and the payment is done automatically with an early payment discount and creating a payment file. This also means you are reducing your expenses.
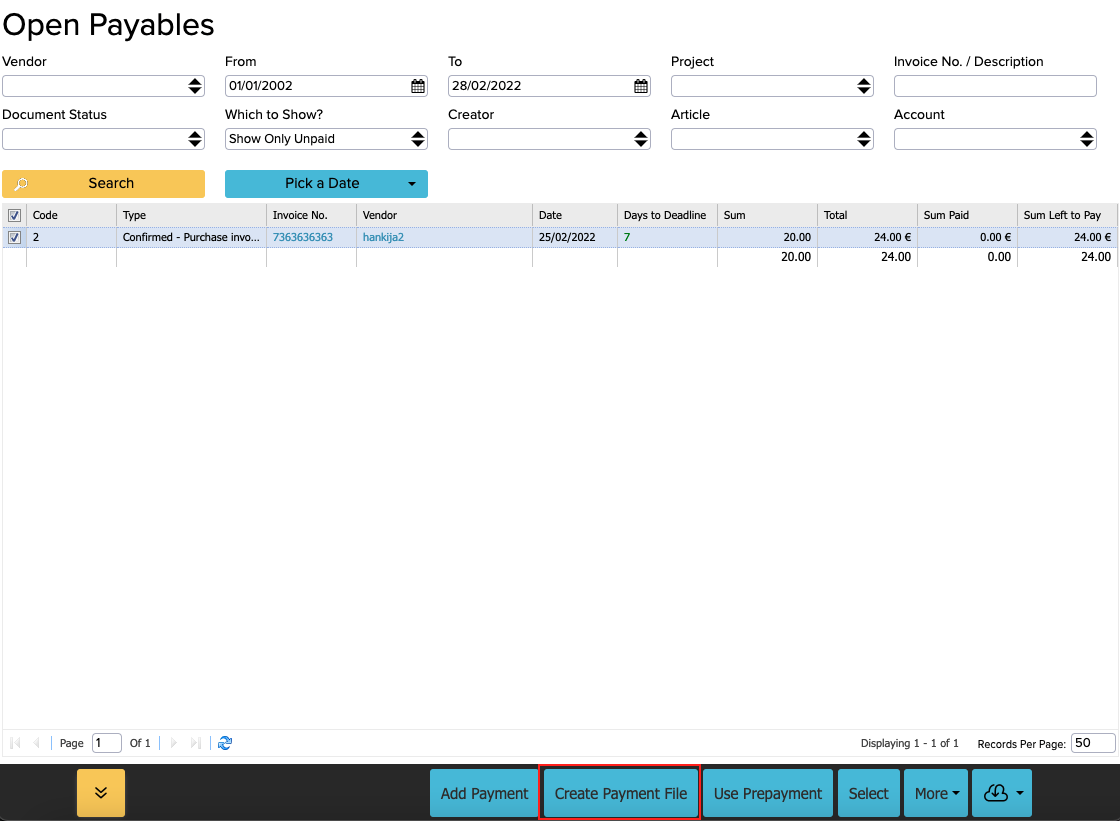
Now you can go to Purchases -> Purchase invoices -> Open Payables, select the invoice you want and click “Create Payment File”.
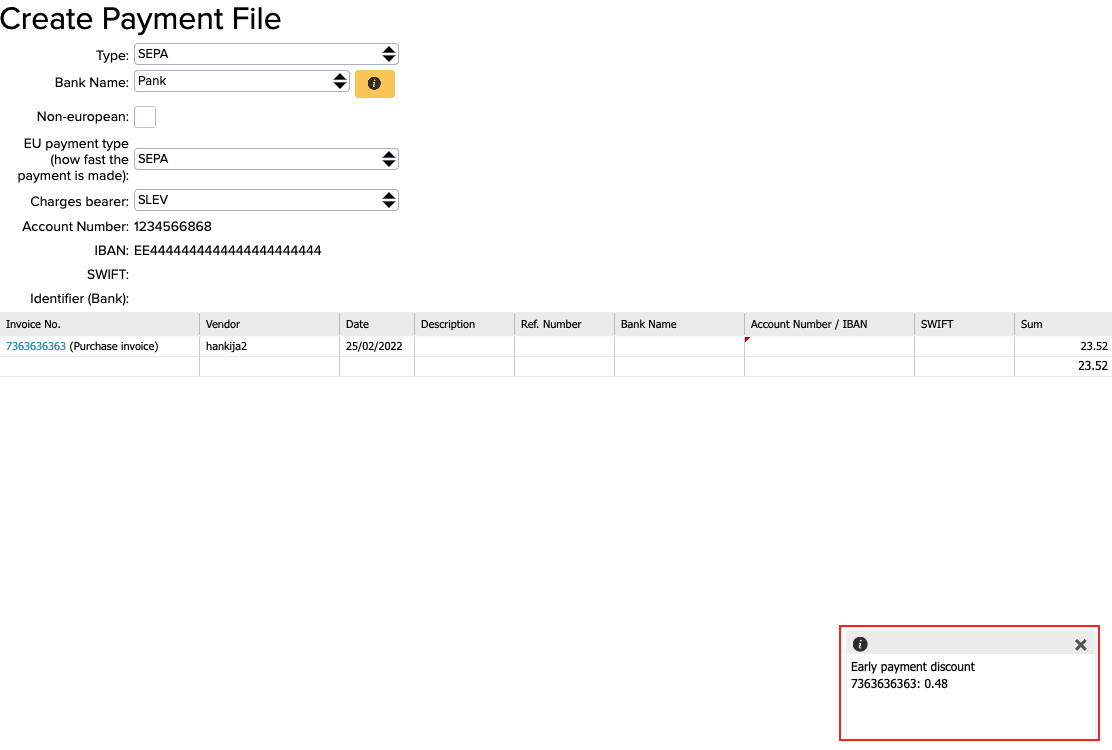
Then, the discount value pops up in the bottom right-hand corner.
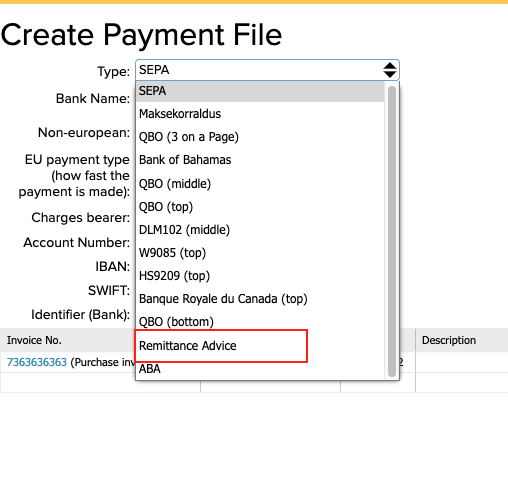
In order to use this to create a payment file, you need to give us the format that you can use at your bank. We support the following formats:
SEPA – pan-European
ABA – Australian Banking Association
Check templates – used in Canada, the US, the Bahamas
Remittance Advice
Older Estonian and Finnish bank formats (CSV files)
So now when you open Purchases -> Cash out and select the invoice that uses an early payment discount, click on “Other”, then “Show Invoice Payments”. There you can see the two rows that say you paid less because of the early payment discount and the other row is the rest of the money that is transferred to the linked account.
If you don’t have this global but still want to use the early payment discount, you can print a “Remittance Advice” and send it to the supplier. Just open Purchases -> Purchase invoices -> Open Payables, select the right invoice and click “Create Payment File”