
Manual Synchronization
Use manual synchronization when you need to synchronize specific data from ERPLY immediately, without waiting for the next scheduled automatic synchronization, or when you want to synchronize data for a specific period.
To synchronize data from ERPLY POS to ERPLY Books, open the Sync with ERPLY POS & Inventory module from the Sales or search for “Sync with ERPLY” using the search bar on the home page.
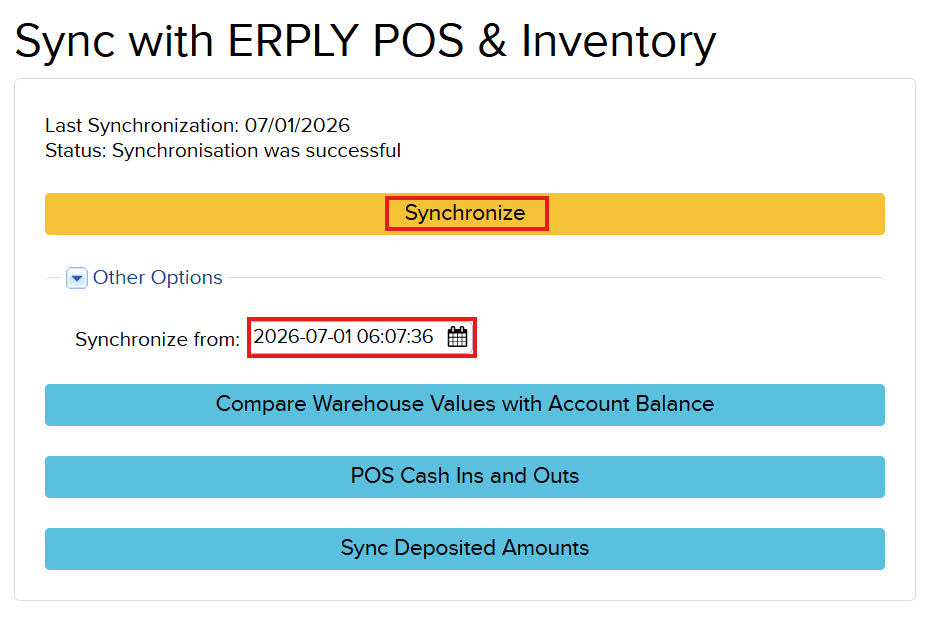
This page displays the time of the last synchronization and whether it was completed successfully.
You can also manually synchronize different types of data from ERPLY. Clicking the Synchronize button synchronizes all available data from ERPLY at once.
The “Synchronize from” field is automatically populated with the date and time of the last synchronization. During the next synchronization, ERPLY Books synchronizes ALL CHANGES made since the previous synchronization. This includes transactions that have been added, modified, or deleted after the last synchronization. If you make changes to transactions from an earlier period after the last synchronization, you do not need to synchronize that earlier period again. Those changes will be included automatically in the next synchronization.
If you want to prevent transactions from before a specific date from being synchronized to ERPLY Books, you can lock the accounting data by going to Settings → Configuration → Period Locked to. Specify the date before which data in ERPLY Books should no longer be updated. After this date is set, any changes made in ERPLY Inventory to transactions dated before the locked period will not be synchronized to ERPLY Books.
Manual Synchronization: Other Options
Under Other Options, you can synchronize only selected types of data instead of running a full synchronization. For example, you can synchronize only Sales, Sales and Payments, Purchase, Payments, Inventory Transfers, Inventory writeoffs or Inventory Registrations
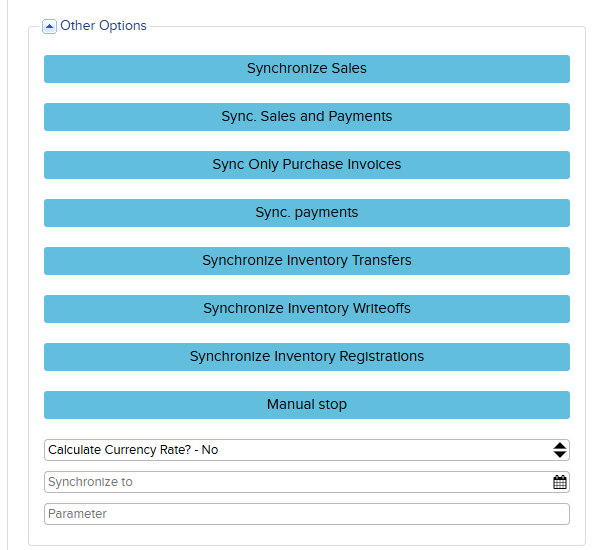
You can also specify an additional synchronization condition. This parameter allows you to define more specific synchronization criteria, so that only the documents, payments or other records that meet the specified conditions are synchronized.
For example, if you want to synchronize only orders, enter &type=ORDER (the parameter must always start with &). If you want to synchronize only the payment with ID 49994, enter &paymentID=49994.
Make sure to click the synchronization button that corresponds to the type of data for which you specified the parameter. Since ERPLY Books uses the ERPLY API for synchronization, the same parameters and available filters are documented here.
If you want to synchronize a specific period—for example, 15 April—set both the “Synchronize from” and “Synchronize to” fields to 15 April, then click “Synchronize”. In most cases, this option is not required. However, it can be useful in certain situations.
For example, if you have been using ERPLY Inventory and are starting to use ERPLY Books, you can use this option to synchronize data for a specific period. It is also useful when you need to re-synchronize transactions from a particular date or period.
If you want to stop a manual synchronization that is currently in progress, click “Manual Stop”.