Projects in ERPLY Books
This guide to show the possibilities of using projects in ERPLY Books. A project is just a feature, a parameter that works across all the modules in ERPLY Books. It doesn’t have to be a warehouse, it can also be an individual employee, a group of people, a car, a product, a city etc. It’s also possible to use hierarchy between projects – the Main Project option unites others under it.
To begin with, there are so many options what you can do with projects in ERPLY Books. For example, you can assign different projects to an invoice at the same time. You can also view a variety of reports according to the selected project(s) and authorize employees to only see the data assigned to them by a project.
In addition, the overall page for adding, modifying and viewing projects is located under “Settings” > “Initial Data” > “Projects”.
Project on invoices
The cell for adding a project on invoices is located as the last cell on the Article row (as shown on the image below).
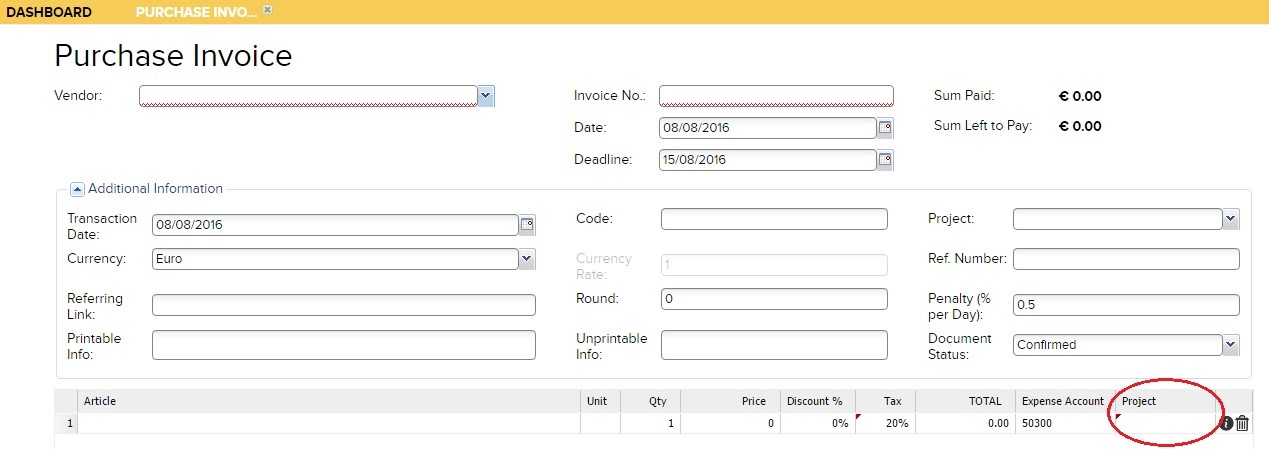
If you have previously added a project into the system, you can choose it from that cell. If you haven’t, then you can add one from the same cell (by clicking on it, “Add+”, which leads to the adding page).
Example: Your company buys office supplies only for the Tallinn department. You’ll have to fill in all the required fields on the invoice and select Tallinn from the project cell. Then the software will link this invoice with Your company’s Tallinn department.
Article projects
If you want the system to immediately associate it as a new project when you add an article, you need to add a new rule under Global Parameters. You can find Global Parameters in the search box on the main page.
Press the blue ‘’Add’’ button to add a new row:
- Name=GLOBAL_CREATE_PROJECT_FROM_ARTICLE
- Value=true
- AltValue=ARTICLE_FIXED_ASSET
- AltValue2=project group id
- AltValue3= set to “true” if you want this to be mapped into other rules.
Meaning: whenever this article is used in sales or purchase invoices, then this project is selected.
Save the changes and log out and back in for the changes to apply. From now on, the new project will be added to the article now.
Sharing invoice between projects
If your company wants to divide the invoice between different projects, You should add as many Article rows on the invoice as there are different projects.
Example: Your company buys two computers, one will go to the Tartu department and the other one to Tallinn. In this case, you’ll have to create two Article rows, where the first row has Tartu and the other one Tallinn in the project cell (as shown on the image below).

Multi-projects on invoices
ERPLY Books allows you to link different projects with the whole sum of the invoice (as opposite to the previous section). You can do that under the invoice’s Additional Information.
To implement this option, you’ll first have to go to page “Settings” > “Configuration”, tick the box after the phrase “Enable Multiple Project Selection”, save it and refresh your browser. If you haven’t ticked this option, you can only choose one project for the whole invoice.
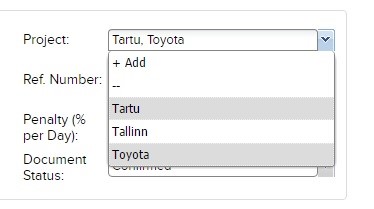
Example: You have two divisions (Tallinn and Tartu). Your company has a car (Toyota), which is not directly related to any divisions, but works for them all. You must link all transactions to the correct divisions and you also want to separately see the costs for the company’s car. Therefore, some transactions must include 100% of both projects – the car and the division.
More specific example: Toyota had an accident in Tartu and the reparing cost 330€. Therefore, You must choose Tartu and Toyota in the project cell (as shown on the image below).
Main Project
The Main Project option allows you to unite others under it.
Example: Your company has four employees in Tartu. In this case, the employees can all be separate projects, but they can all be united under their Main Project – Tartu. You can set up Main Projects in the Projects module, where you’ll have to add the column: Project (Main) (as shown on the image).

Add all the employees as separate projects and then add ‘Tartu’ to all of them under the column Project (main).
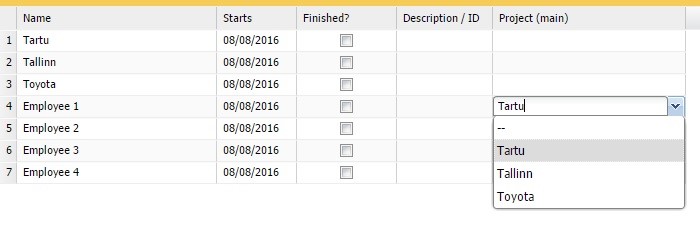
This enables for the group of employees (who are each separate projects) to be united under the Main Project Tartu.
Projects Reports
All projects can be reflected in all of the reports. You can choose as many projects as you wish. Selecting multiple projects on a report query is an “OR” sentence. This means that if you choose projects X and Y, the query is made up as the following sentence: “Give me all the transactions, that have the X OR Y project on it’. If you want to make a query with an “AND” sentence, You must do it in the Report Generator (“Reports” > “Report Generator”).
User with a related project
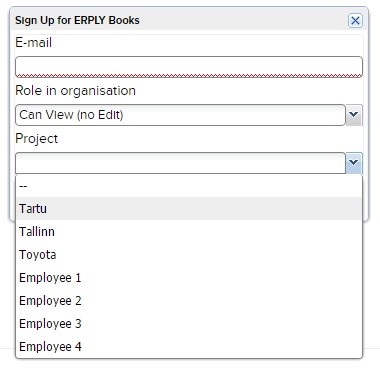
ERPLY Books has a solution, in which you can appoint a specific user to see only the data of the project he/she is authorized to view. This option can be applied on the page “Settings” > “Users”.
Example: Your company has a number of different departments with different chief executives. You want him/her to only see the data of it’s department and nothing else. When you add a chief executive as a user in ERPLY Books, you can appoint to him/her a limiting role and a project (as seen on the image below).
Various examples of project management
- The construction company:
- See each object as a project;
- View employees as projects to see, which one of them works efficiently.
- Public company:
- View all dimensions of the public sector (such as the types of cash flows) as projects.
- Software Development Company:
- See every software project as separate projects (as well as each client);
- View employees as projects, to see who will bring in the most.
- Retail chain:
- Each department/division/warehouse can be a project;
- It is also possible to view the staff as projects, to track their performance.
- Wholesale Chain:
- Each department or employee can be a project;
- In addition, it is reasonable to add all the cost factors as projects (cars, buildings etc.);
- Real estate company:
- Track every building as a separate project.
- Or vs and setting in configuration (“Settings” > “Configuration” > “Other options” >”Use AND (not OR) clause in project search”)
- Or – by default;
- And – when you add project settings.
Project groups
In ERPLY Books, you can group similar projects into project group. That makes managing and finding project groups easy. Purchase invoices can be linked with project groups. In addition, project groups can also be chosen in different reports like in balance sheet, Income sheet, general ledger, journal report, manual journal, in customer and supplier reports etc. Click on the arrow in “Project” cell to make choice.
In order to read more about project groups, click here.
FAQ
- I don’t see the Additional Information on invoices by default. How can I change it?
Go “Settings” > “User Settings”, tick the box labeled “Show Extra Information Bar”, save and log out-log in. Then you’ll be able to see Additional Information part by default every time you create a new invoice.
- Where can I see all the projects together in one report?
Go to “Reports” > “Project Report”. If you want to see all the projects, don’t select anything in the project cell. Just add the suitable dates and search. The system creates a PDF file of all the projects in the selected period.
Another option is to print the account balances by projects. You can find this option from the dashboard’s search box (type “Print Account Balances by Projects”).
- How to divide a transaction not related to any invoice into multiple projects in the Bank Import?
When you upload a bank statement in Bank Import and choose a payment not related to any invoice (by making it active), you can see the project cell in the Payment Information box on the right. From there choose the projects, that you want to link with the payment.
NB! Before that go to “Settings” > “Configuration” and tick the option “Enable Multiple Projects Selection”. Otherwise you can’t choose more than one project per payment.
The button “+ Add Activity” opens a new window, where you can divide the sum of the payment into smaller amounts and add a different project to each one of those rows.
- How do I see the transactions that are not assigned to any project?
Go to “Accounting” > “General Ledger” and select “–Not in Projects–“ from the “Project” cell. This option returns all the transactions that are not assigned to any project.
- How to view a phone that company bought for an employee in projects?
Example: Your company bought a phone (fixed asset) for an employee. When you create the purchase invoice, You add the correct supplier, article and choose the employee as the project. The this transaction will appear in every report in reference to the employee.