Mark invoices as paid
In ERPLY Books you can easily add payments or receivables to large purchases or sales invoices at once.
- To mark sales invoices as paid, search on the main page ‘’Mark Sales Invoices as 100% Paid (Multiple at Once)’’
- To mark purchase invoices as paid, search on the main page ‘’Mark Purchase Invoices as 100% Paid (Multiple at Once)’’
As the Sales Invoices and Purchase Invoices module is identical in ERPLY Books, we will only describe sales invoices in this manual from this point on.
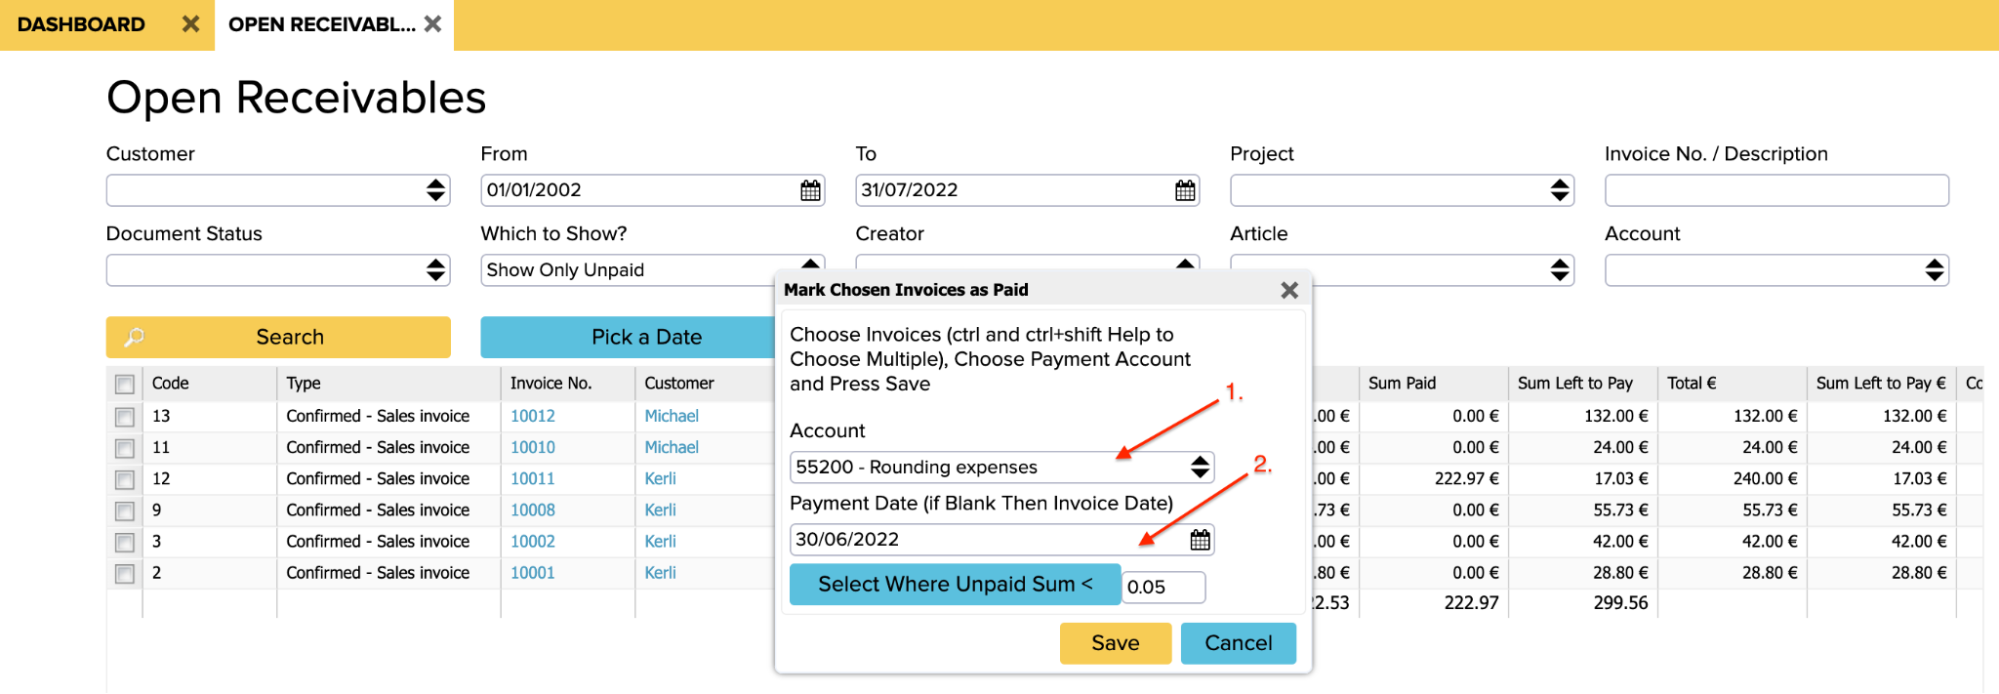
Choosing a payment account and date
If you have chosen ‘’Mark Sales Invoices as 100% Paid (Multiple at Once)’’ on the main page, then the open receivables module will open in a new window. In this window, you can select the account that is used when adding a payment. You can also select one date for payments. If you don’t select a date, then software will assign the date of the invoice that is related to the payment. You also have to keep in mind that the software will add payments to the previous year if the period has not been locked previously (‘’Settings -> Configuration -> Period locked to’’).
Choosing invoices
Now you have to find the invoices to which you want to add the payments. For this you can use all usual search parameters.
The first option
If a company has incurred multiple invoices which have a few cents of debt or overpayment, then choose from the ‘’Which to Show?’’ cell parameter ‘’Sum Left to Pay Less Than…’’ After choosing a parameter, a window will open where you can add the appropriate amount. After adding an amount, you have to confirm by clicking on ‘’Done’’. In order to find invoices matching the entered parameter, you have to click on ’’Search’’.

After that, Books will show only invoices that have a smaller amount left to be paid than the entered amount.
If the relevant invoices have been found, you have to mark them as active. If you want to mark all shown invoices as paid, it is enough to add a checkmark in front of the ‘’Code’’ column. All rows will then become active.
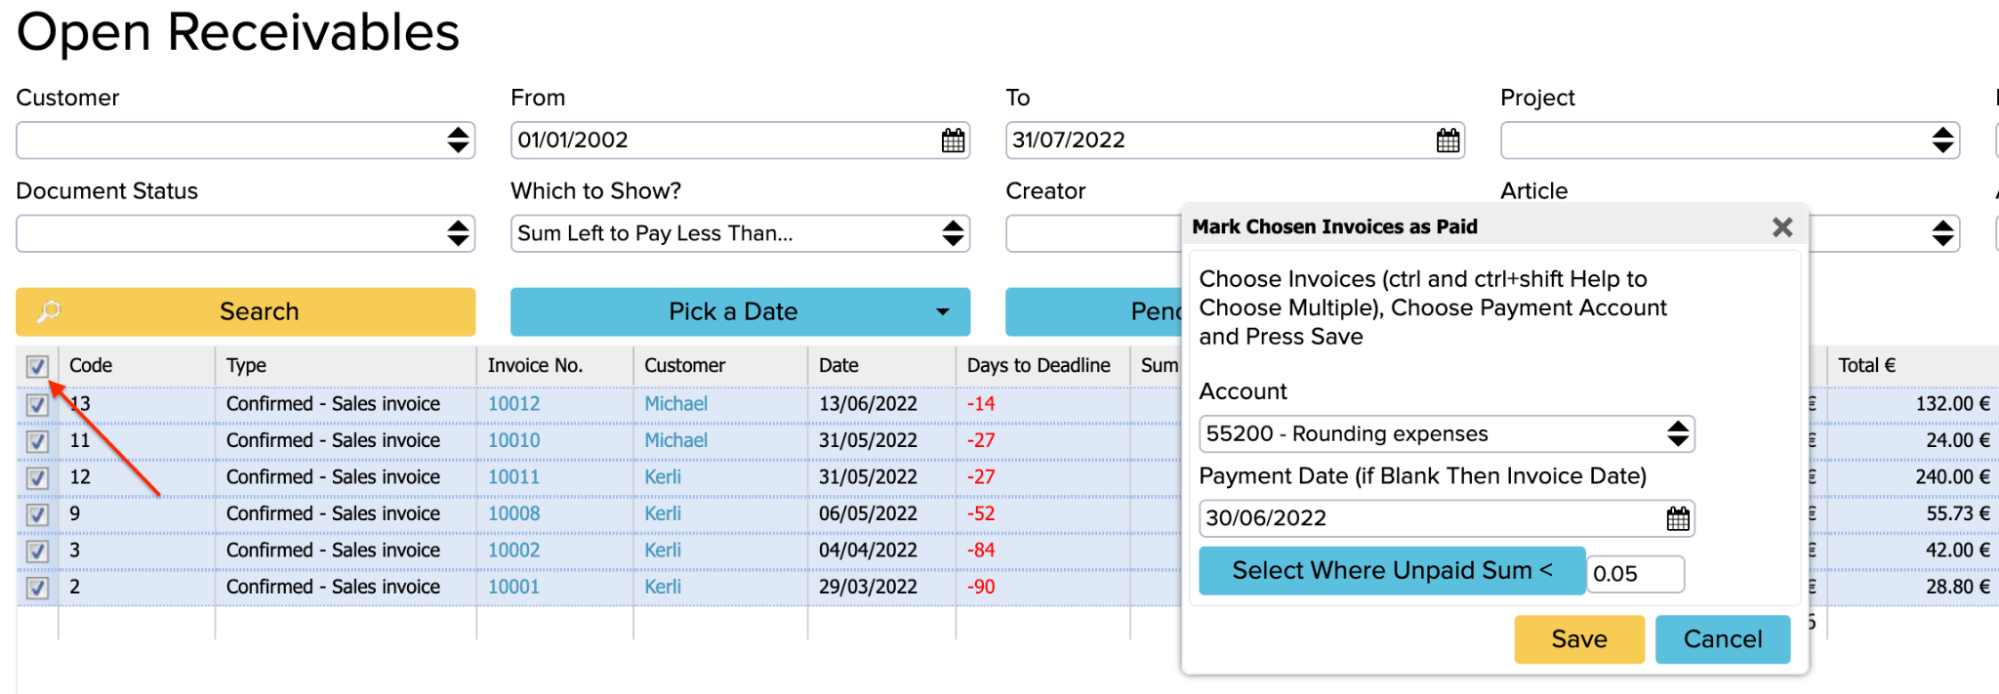
You can also select rows manually depending on if you want to add a payment or not. If there are a few rows that have to remain without a payment, it is faster to check the box in front of the ‘’Code’’ column and after that remove checkmarks from the rows that you don’t want to change to paid.
The second option
There is also a second option for finding invoices. In the new window that opened, press the blue button ‘’Select Where Unpaid Sum <’’ and the software will automatically find invoices that have smaller balances than the set amount. The advantage of the first option is that only the selected invoices are shown on the screen. Through this new window, all invoices are shown, among which the invoices selected appear as blue, but they are not grouped.When invoices are marked as active and the account is chosen, clicking on the ‘’Save’’ button will start the process of adding payments.
To get more information about how to mark invoices as paid in ERPLY Books you can watch following video: